Stable Diffusion 2.x: Inpainting
Date: 12/26/2022
Introduction to Inpainting!
Intro
I have written a guide for setting up AUTOMATIC1111's stable diffusion locally over here. This is a quick tutorial on tweaking a part of an image you aren't too happy with.
AUTOMATIC1111's WEB UI - Seeding your Inpaint
The first thing we need is a solid text prompt to begin generating images. I plan on running the following prompts without seed first. I want to find an image that isn't perfect which isn't too hard but also in the spirit of what I am looking for prompt wise. Its valid for the prompt just wrong in minute areas. I will take that seed of the image then begin inpainting with the same settings. It took 3 batches of 4 before I found the image I would use for this guide.
Text Prompt
Picture of (((John Wick))) running through a rainy city ((holding a gun))
in his right hand, 8k, high definition, digital art, artstation
Negative
((((ugly)))), (((duplicate))), ((morbid)), ((mutilated)), out of frame,
extra fingers, mutated hands, ((poorly drawn hands)), ((poorly drawn face)),
(((mutation))), (((deformed))), ((ugly)), blurry, ((bad anatomy)),
(((bad proportions))), ((extra limbs)), cloned face, (((disfigured))),
out of frame, ugly, extra limbs, (bad anatomy), gross proportions,
(malformed limbs), ((missing arms)), ((missing legs)), (((extra arms))),
(((extra legs))), mutated hands, (fused fingers), (too many fingers),
(((long neck))), bad-artist, (too many eyes), (too few eyes)
Settings
Steps: 40
Width: 768
Height: 768
Batch Size: 4
CFG Scale: 10
Seed: 4219356135
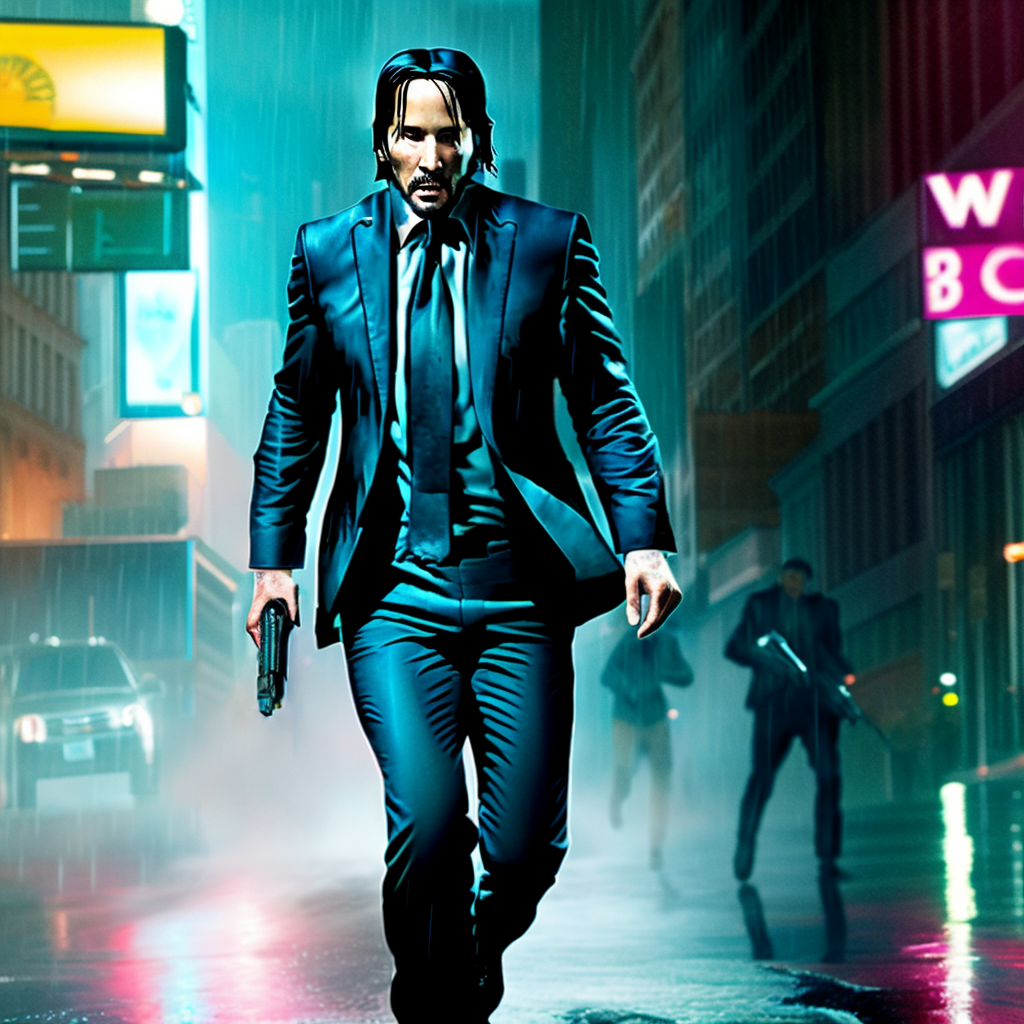
Output Image 1 - Starter/Seed Image

Analyze Whats Wrong With The Image
When I first started playing with StableDiffusion, I went through thousands of renders, trying to cherry pick the best images while discarding the rest. I quickly realized that while my prompting improved, simultaneously becoming quite familiar with the settings, I didn't feel my approach was feasible long term. It was taking far too long to generate something good and the more I tried to lock in one part of image, other parts shifted away from what I like. Inpainting allows us to keep what we like from any image or any generated image and use StableDiffusion to swap, erase, or fill in the blanks. Tweak it. What I kept discovering was dozens of images I had discarded because of a defect that I could have fixed with a simple inpainting. An extra finger on a hand, an extra lip on the cheek, or a dozen extra eyes, etc. Could have all been avoided had I known a little more. This quick introduction to inpaint may help you improve your images - but don't expect miracles. The miracles are still totally at random (primarily prompt driven).
The above image is wrong in a few places. I generally like the overall look but it needs some tweaks and definitley more inference steps. Obviously more resolution but that comes near the end.
- We need to fix that monstrosity in his hand.
- The sign extends too far out.
- What is going on around his hair in the back?
- That bottom left front of his suit jacket looks off.
- The car is on stilts.
- Slender man is moonlighting as a henchman.
- There is a weird light box in the middle of a building.
- His eyes and forehead region look rough.
- His shirt is wrinkled in a weird way.
- His front left jacket is too dark and looks unfinished.
This is definitely the kind of image I would have discarded before I had a little practice with inpainting.
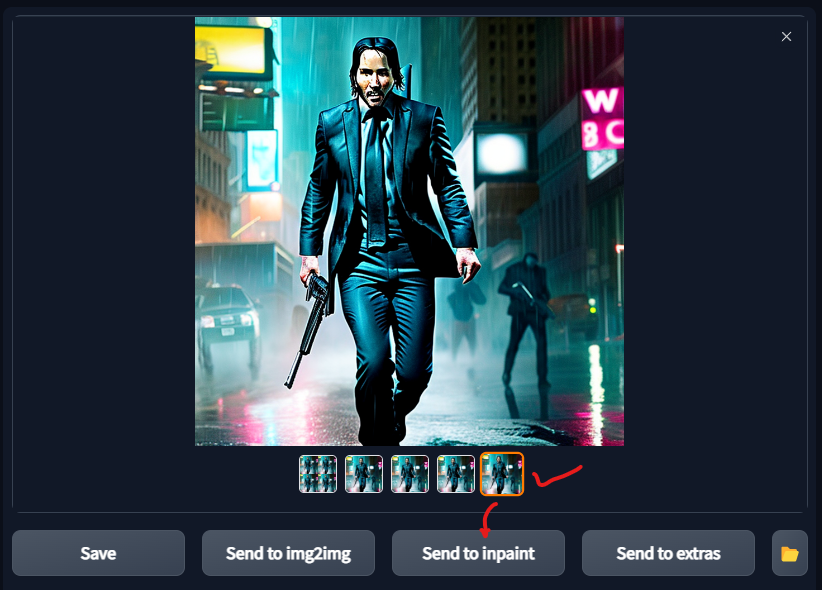
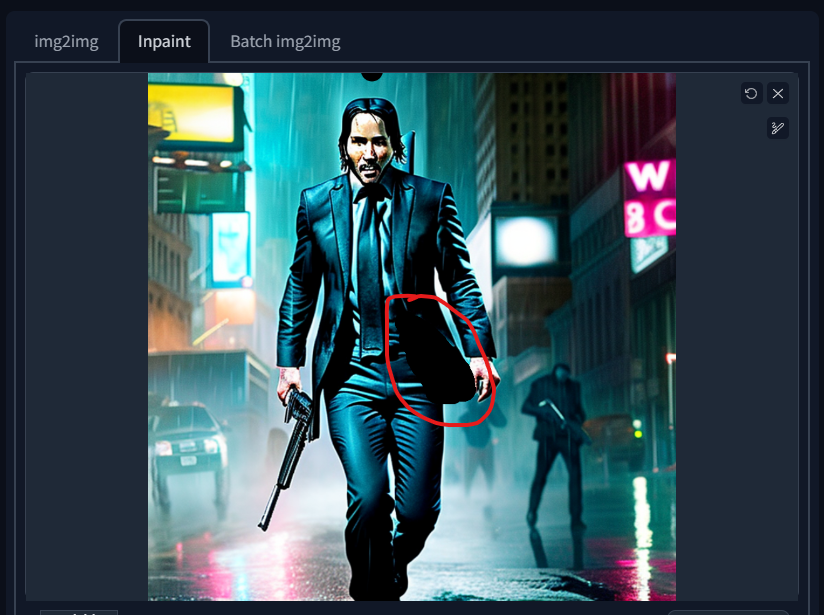
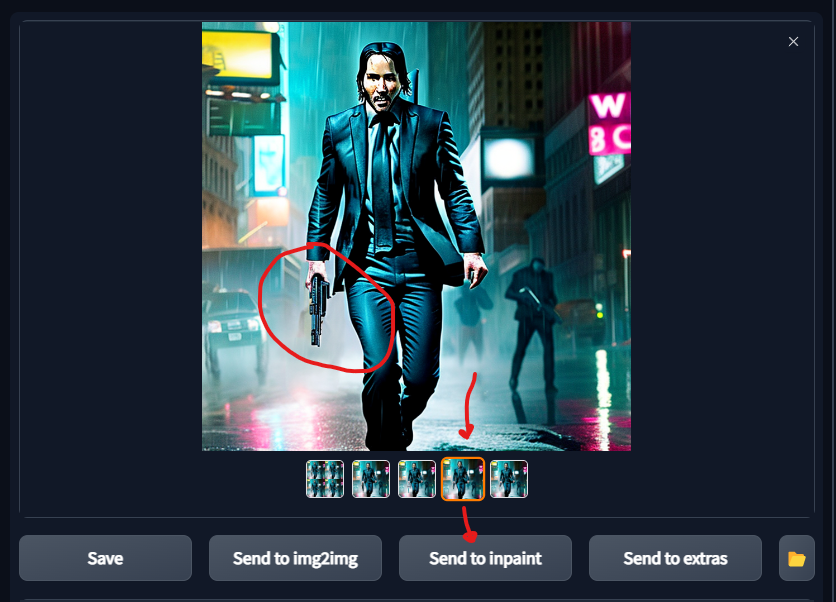
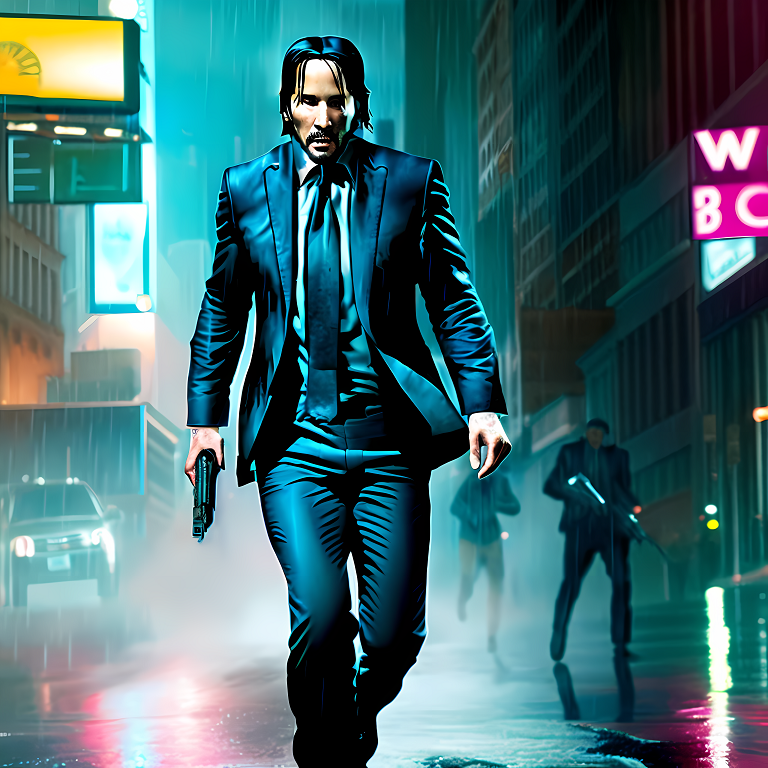
Send To Inpaint
Send to Inpaint!
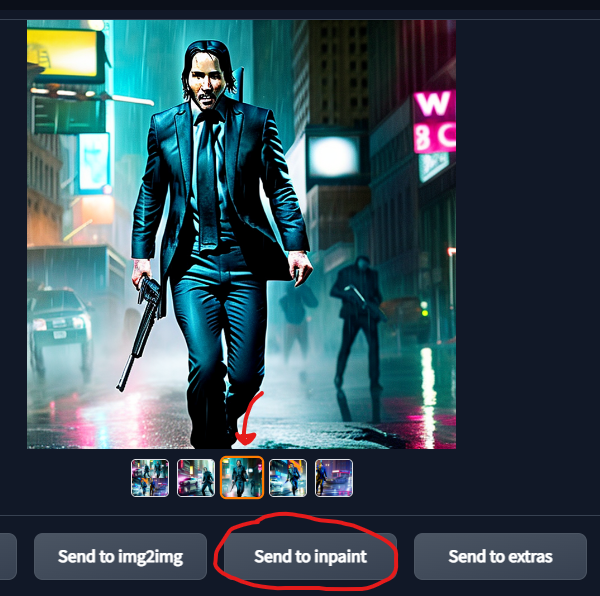
We are going to use the same settings but adjust our new inpainting options a bit.
- Shrink the brush, less is often more, but there is a undo button next to the X.
- Start with a
Mask blurof 2. - Set it to
fillin content for now. - Optionally if you are inpainting at full resolution there is a slider to increase or decrease how many pixels it will adjust accordingly. If you feel that the changes to area are too severe try decreasing the value a bit. I won't be using it here.
Text Prompt
Picture of (((John Wick))) running through a rainy city ((holding a gun))
in his right hand, 8k, high definition, digital art, artstation
Negative
((((ugly)))), (((duplicate))), ((morbid)), ((mutilated)), out of frame,
extra fingers, mutated hands, ((poorly drawn hands)), ((poorly drawn face)),
(((mutation))), (((deformed))), ((ugly)), blurry, ((bad anatomy)),
(((bad proportions))), ((extra limbs)), cloned face, (((disfigured))),
out of frame, ugly, extra limbs, (bad anatomy), gross proportions,
(malformed limbs), ((missing arms)), ((missing legs)), (((extra arms))),
(((extra legs))), mutated hands, (fused fingers), (too many fingers),
(((long neck))), bad-artist, (too many eyes), (too few eyes)
Settings
Steps: 50
Width: 768
Height: 768
Batch Size: 4
CFG Scale: 10
Denoising Strengh: 0.75
Seed: 4219356135
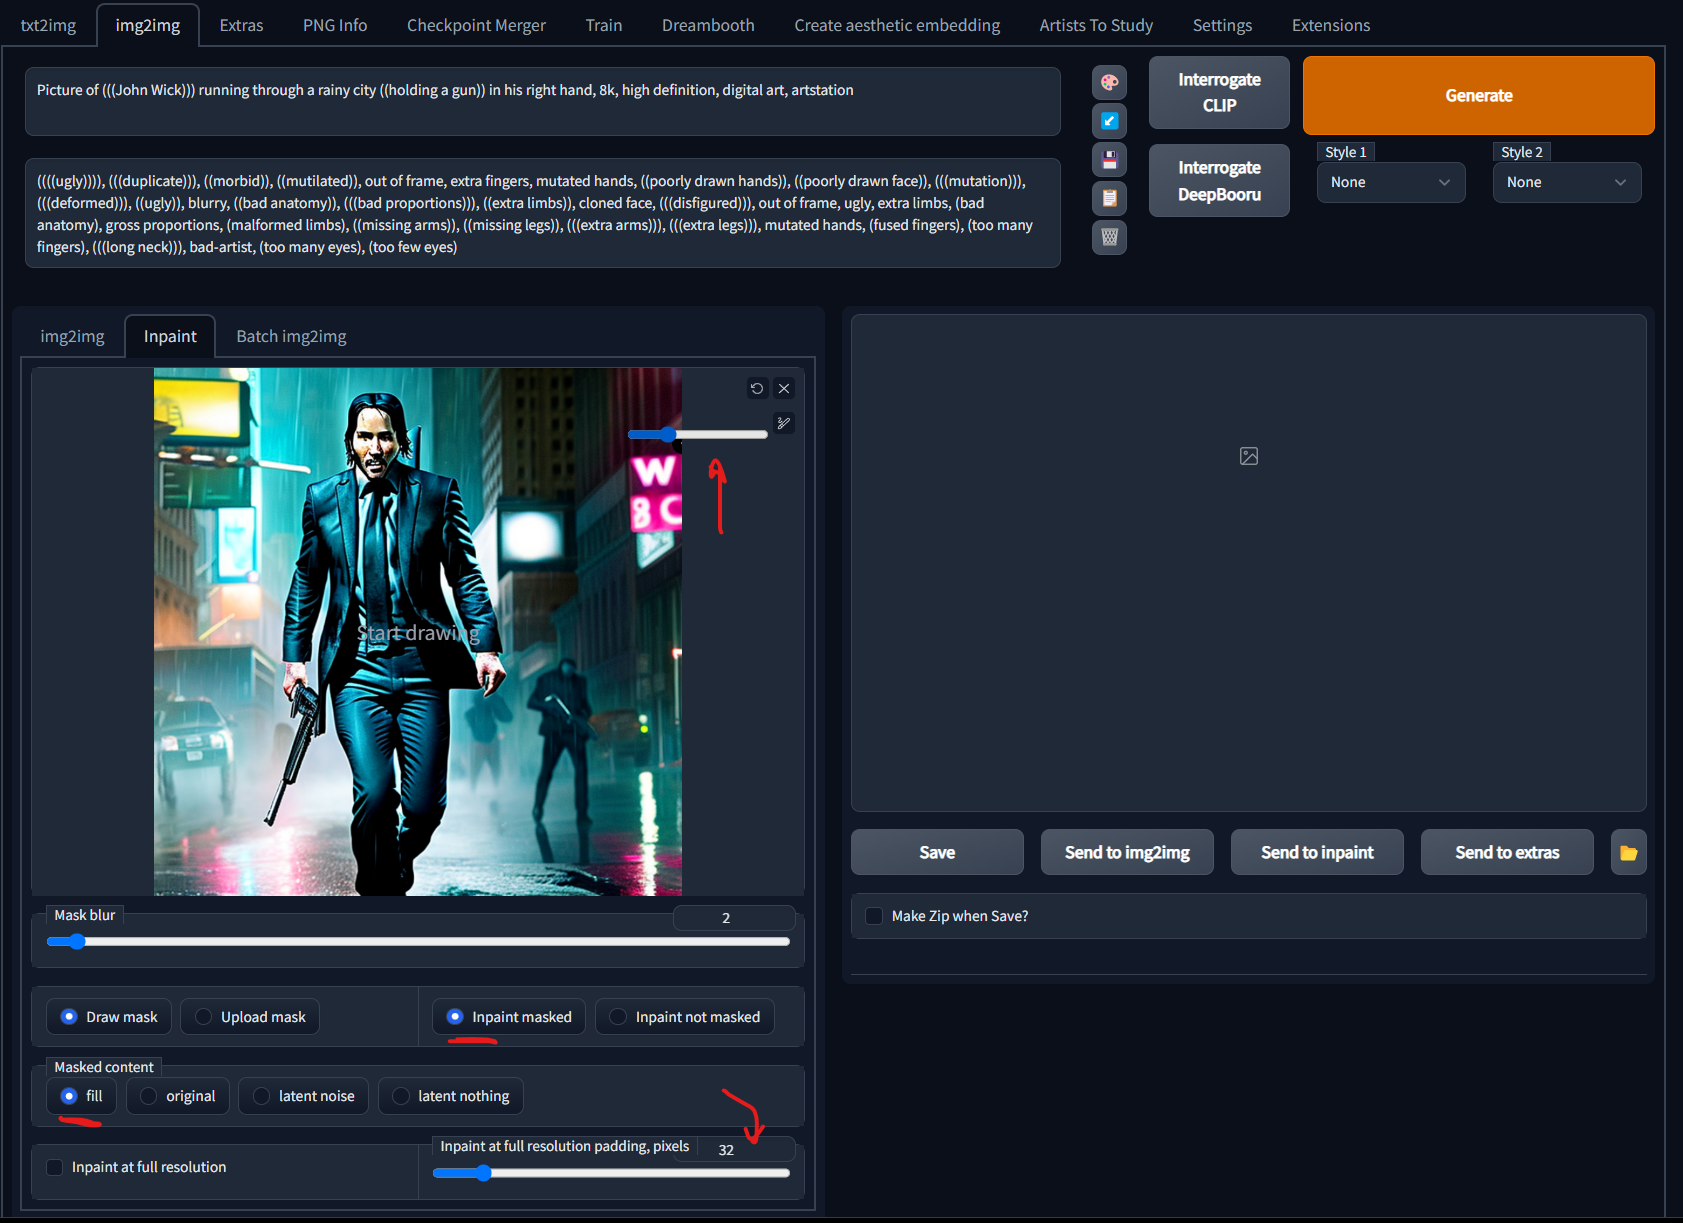
Mistake Number One
Trying to change too much all at once. Select just one thing we are going to work on at time. Generate a batch of options, send the one you like (or re-generate the batch) back to inpaint after removing the mask. Save the most complicated changes (and ultimately the most frustrating ones) till last.
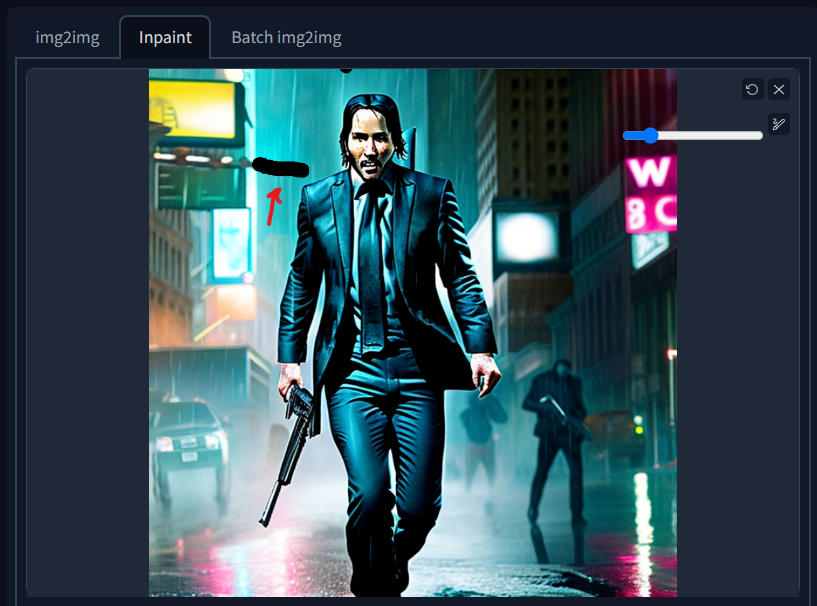
Let's do our first batch of images generated. This is not cherry picked.
The bottom right image is perfect (to me of course). Now we send it back to to inpainting!
Click the X to quickly clear the previous "masking" on the Inpaint side (not the batch side).
Output Image 2 - Sign Partial Removal

Send Back To Inpaint 2
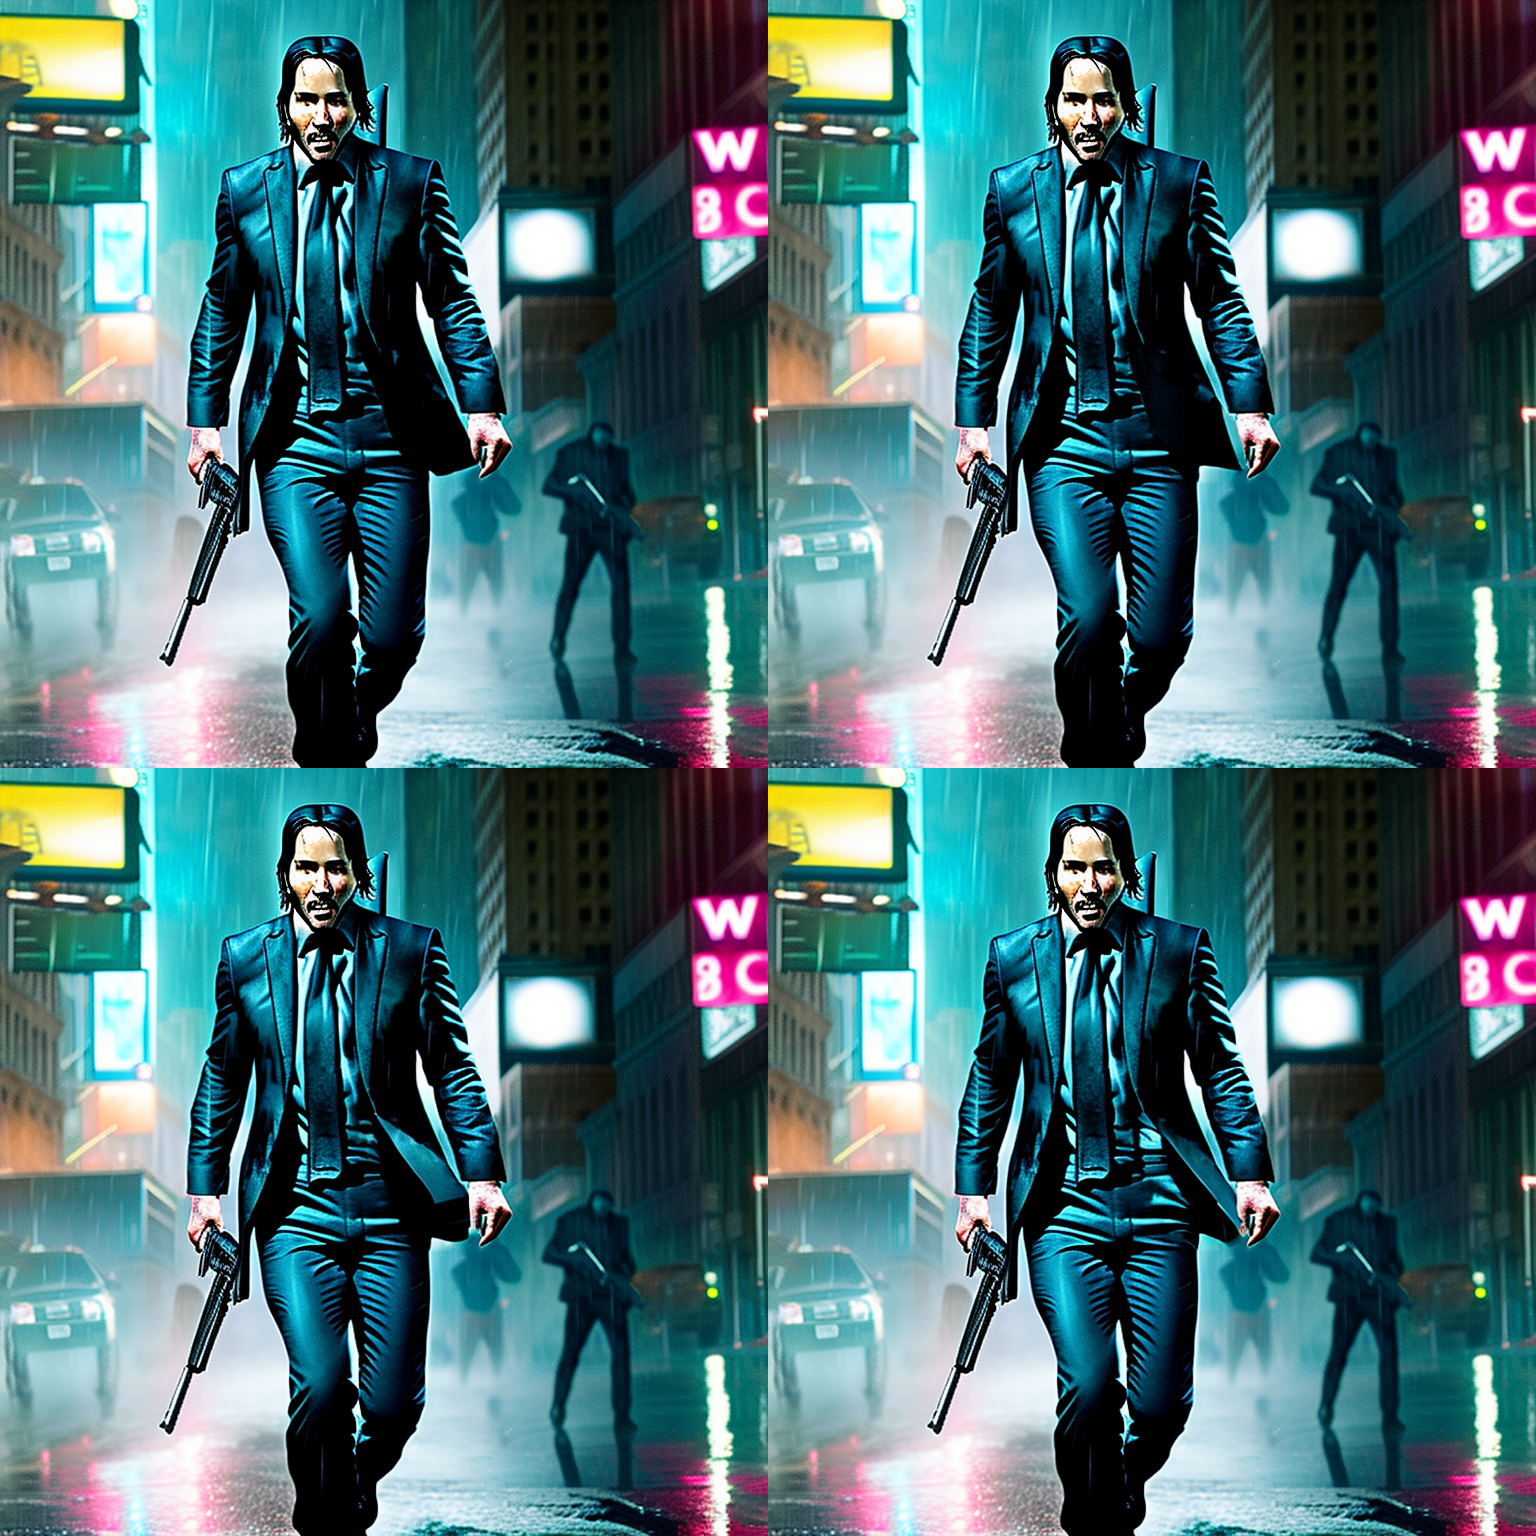
Now we the have the first part fixed, I am going to try and redraw the front left of the suit with varying degrees of increasing masking. It will be difficult to see since it is on such a dark image but I will circle it.
Output Grid - All Same Settings
Here is the output. The 3rd image (bottom left) is the one I like.
Output Image 3 - Suit Correction
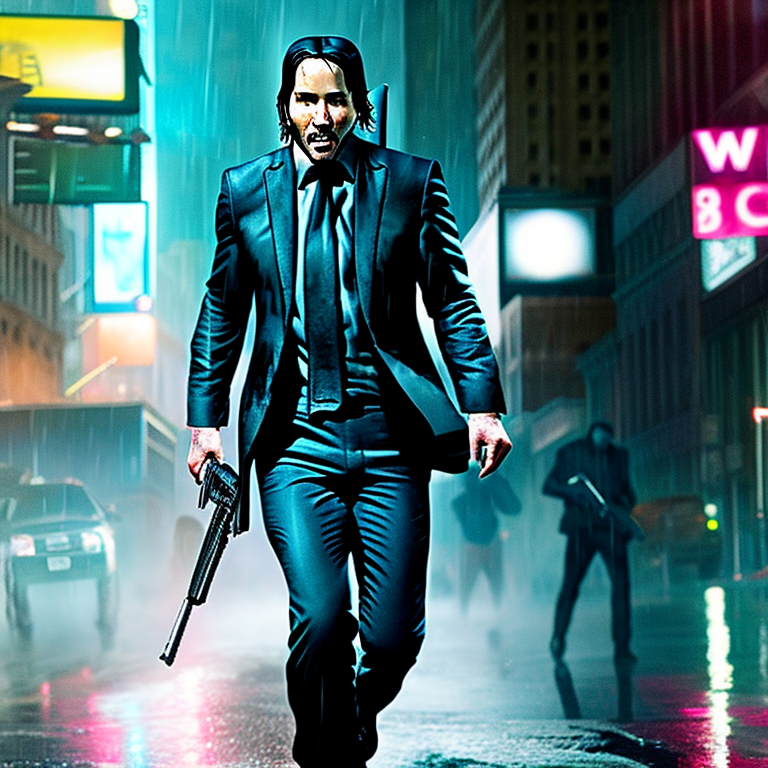
Send To Inpaint 3
Send the previous image back to inpaint after clearing the masking. And lets start working on the gun.
I am going to test a reduction in size first by painting a whole new area in there.
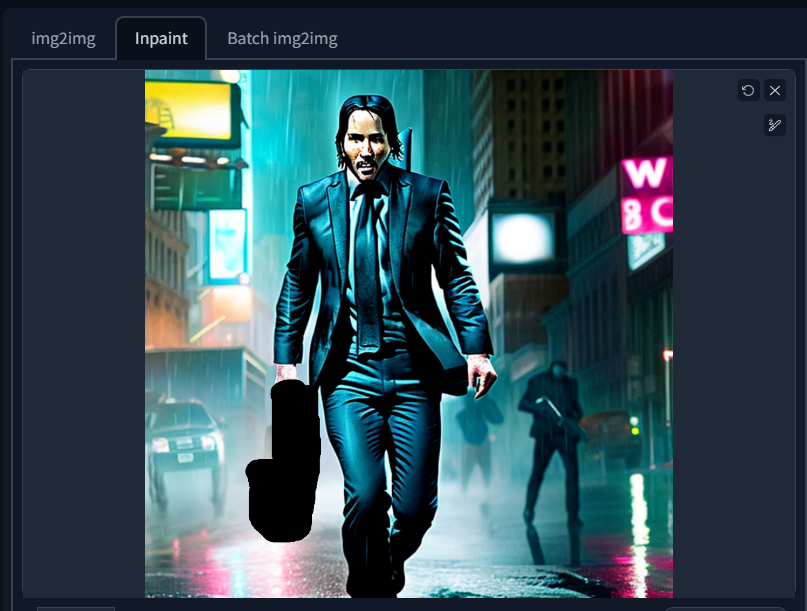
What I am hoping to generate is a new seed for inpainting but I need a smaller item. I was able to generate an image in my first batch.
Back to inpaint!
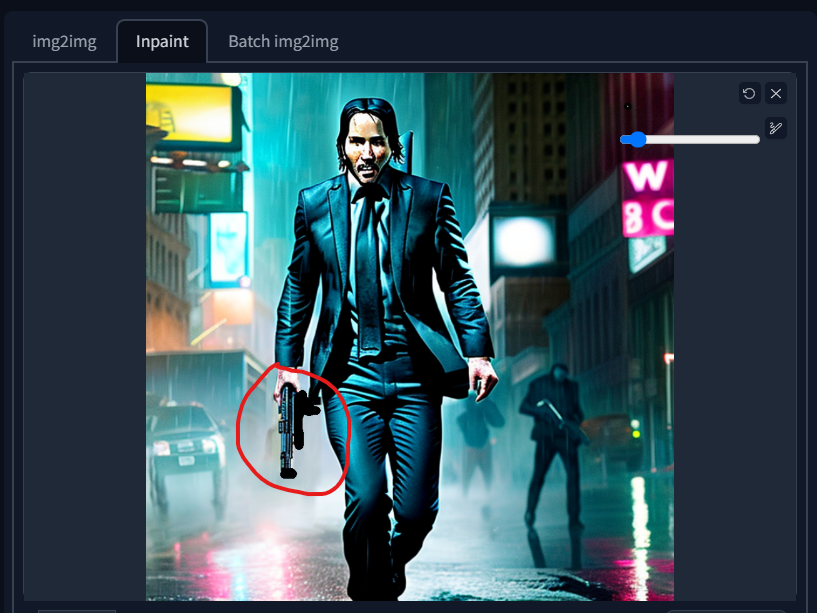

Keep Tweaking (aka Send to Inpaint 9,135 times)
I am kidding but now we are pretty close. We need to adjust the Denoising value. This affects
how much it will diverge from the current image.
Settings
Steps: 50
Width: 768
Height: 768
Batch Size: 4
CFG Scale: 12
Denoising Strengh: 0.5
Seed: 4219356135
Output Image 4


You want to keep doing this until you are satisfied! You may want to increase or decrease your denoising values if the results are too dramatic or not dramatic enough. Lower noise can also help blur out certain parts.
Step 11 - Fixed Gun Image 5
I kept repeating, feeding back to inpainting, and adjusting the mask. I believe it took another 4 or 5 batches to get it to this.

Fix the Remaining Oddities
The more you look at something, the more you can start spotting the imperfections. The tie just ends like it was cut off, what IS going on with those the car wheels?!, what the hell is that thing behind his head???
Remember, lowest denoise to erase, medium to sort of tweak it in or lock it in, large means more variation. I adjust the denoise here between steps.
I will do the tie first followed up with the thing behind his head.
Settings
Steps: 50
Width: 768
Height: 768
Batch Size: 4
CFG Scale: 12
Denoising Strengh: 0.5
Seed: 4219356135
Before & After


Send to Img2Img - Final Resolution by Batch
I am now going to port this to 1024x1024, with varying inference steps to try and cleanup detail. I am shrinking the batch size to 2 due to VRAM limitations on the RTX 3090. I will start with 50 inference steps and increase in increments of 5 until I hate it. Feeding the image back into the Img2Img prompt or inpainting as I see fit.
Settings
Steps: 50
Width: 1024
Height: 1024
Batch Size: 4
CFG Scale: 12
Denoising Strengh: 0.1
Seed: 4219356135
Before & After

Inpainting - The Face
Now that we are dealing with 1024x1024, I am going to clean up some details around
Keanu Reeves face. This is virtually impossible to do from the distance John Wick is
from the "camera". Not enough surface area to make meaningful changes. You could mask
his entire face, set Denoise to 0.75 and start playing face roulette. I am not going
to do that for this guide. I am going to clean up some of the rougher parts. Fixing
one section at a time and then fixing the next one.
Settings
Steps: 65 (increase if missing detail, decrease if I feel the change is too grainy)
Width: 1024
Height: 1024
Batch Size: 2
CFG Scale: 9.5 (minor variation)
Denoising Strengh: 0.6 (major variation depending on what I am doing)
Seed: 4219356135
Before & After
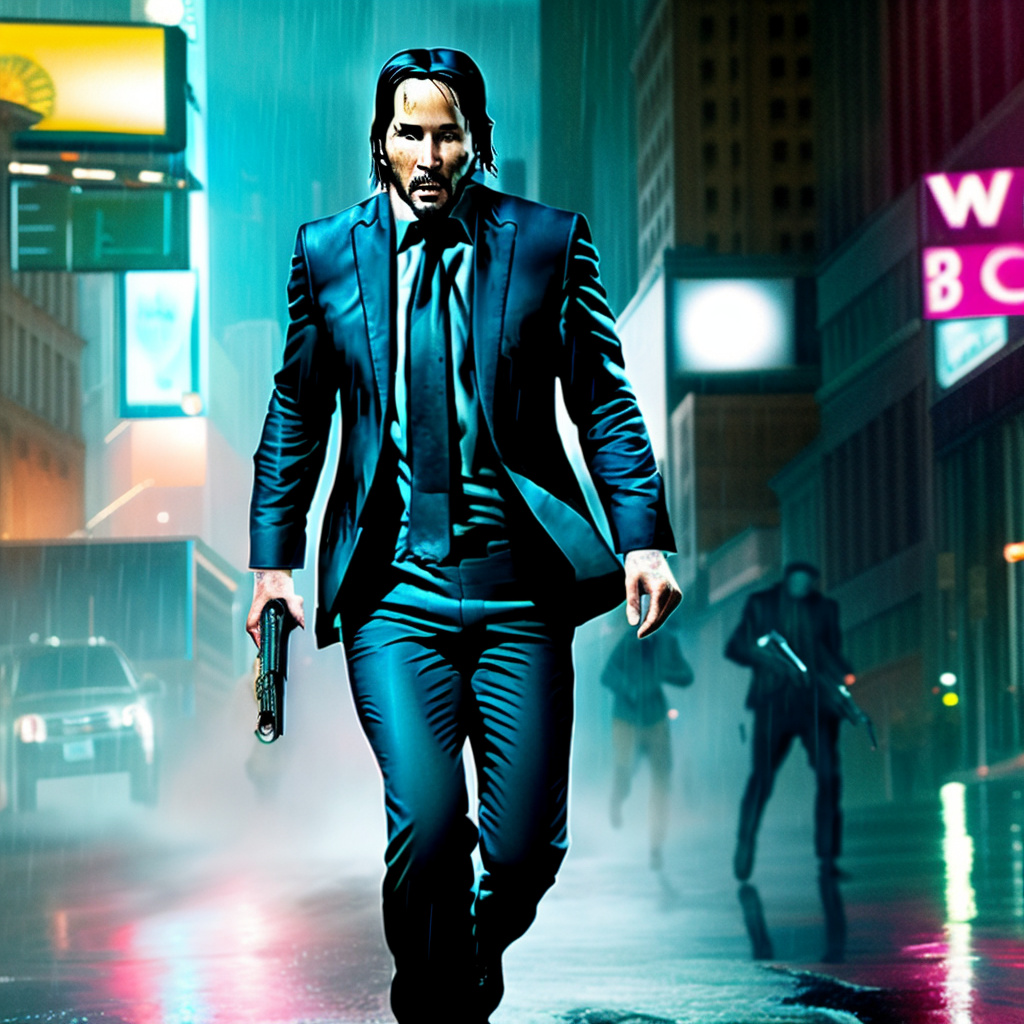
Upscale with R-ESRGAN 4x+ Anime6B
This should suffice for the purposes of the guide. Now we upscale and finish it.
Start & Finish
Final Thoughts
All the image sliders above kept the pictures at the same resolution for the comparison. So it's not a totally a fair comparison but the results really I think speak for themselves.
Links
- Automatic1111 - Xformers Guide
- Facebook - Xformers