Stable Diffusion 2.x: Setup Locally
Date: 12/24/2022
Updated: 12/26/2022
How Can I Run Stable Diffusion Locally?
Intro
Machine Learning is so hot right now.
Normally, it kind of annoys me how people pick up on trendy things so quickly. Not that I don't
appreciate people learning about technology. It's nice to see people excited about things in
general. Being a cynic though, I am generally not a fan of hype and people are hyped about AI.
Seeing as how Copilot and ChatGPT are here to take my job (which is essentially building
fancy CRUD apps these days) I figured I would expand my skill set!
When the Robots are here to take our jobs, the crafty and shrewd person rapidly learns how to
fix Robots.
    - Tristan Hyams (Tristan's Law of Robotics)
Now to be clear, this guide will not fully explain how Stable Diffusion works. I don't feel fully comfortable writing that as I'm still learning it myself. That will make a great guide unto itself. Instead, I am merely creating an introduction to running StableDiffusion locally.
I have decided to base this first guide around using an open source setup from AUTOMATIC1111. It seems like the most comprehensive collection of functioning tools while not having a steep learning curve. A User Interface vs. running through Notebooks or CLI ain't bad either.
My Machine's Hardware
- ASUS ROG STRIX RTX 3090 OC White Edition
- Intel i9 10900K @ 5.0 GHz
This guide is primarily for CUDA/nVidia cards. The CPU doesn't really have to be top of the line
as the heavy lifting is going to be done by GPU. There are ways to run with lower VRAM GPUs but
I do recommend ones with VRAM of 10 GB+ for the speed. I will note though, it does seem a little
unoptimized and leaky as I have encountered a plethora of OutOfMemory exceptions while having
12 GB+ of VRAM still free. I honestly suspect its the notorious a data engineer worked on this...
You will need a beefy CPU if doing the slower CPU-only inferences.
Give a Data Scientist a VM with 64 GB of RAM and they will use it.

Give that same VM to a Backend Engineer and they will start checking
the code for memory leaks after the app uses 0.5 GB at runtime.
    - Tristan Hyams (Tristan's Observations of Data Scientists)
I kid the Data Scientists, but they know what I am talking about.
Anyways, let's get AUTOMATIC1111 WebUI setup with a Stable Diffusion model!
My Machine's Setup
- Windows 11 Prod (latest updates installed as
12/23/2022) - Python
v3.10.6 - Git For Windows (x64)
v2.39.0 - nVidia Drivers
v527.56
Monitoring Your nVidia Card
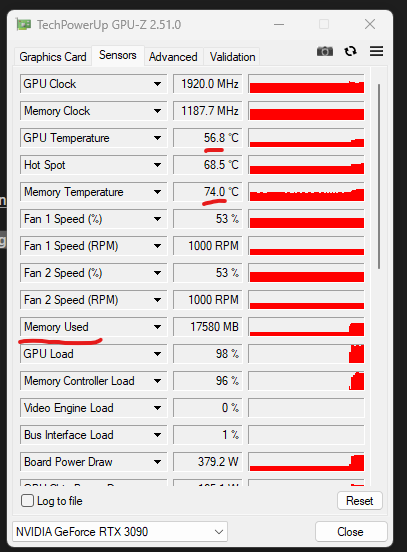
It's good to know how to monitor your GPU VRAM usage. I recommend GPU-z from Techpowerup. For any overclockers or benchmarkers, it's a widely known tool for monitoring your GPUs. It provides solid instrumentation on several components of the GPU, most importantly, view temps, VRAM usage, power draw, etc.
I also recommend learning the following command.
nvidia-smi
Executed in Terminal/CMD/PowerShell.
Example Output.)
PS C:\Users\cat> nvidia-smi

Sat Dec 24 10:42:56 2022
+-----------------------------------------------------------------------------+
| NVIDIA-SMI 527.56       Driver Version: 527.56       CUDA Version: 12.0     |
|-------------------------------+----------------------+----------------------+
| GPU  Name            TCC/WDDM | Bus-Id        Disp.A | Volatile Uncorr. ECC |
| Fan  Temp  Perf  Pwr:Usage/Cap|         Memory-Usage | GPU-Util  Compute M. |
|                               |                      |               MIG M. |
|===============================+======================+======================|
|   0  NVIDIA GeForce ... WDDM  | 00000000:01:00.0  On |                  N/A |
| 53%   40C    P0   129W / 390W |    759MiB / 24576MiB |      1%      Default |
|                               |                      |                  N/A |
+-------------------------------+----------------------+----------------------+

+-----------------------------------------------------------------------------+
| Processes:                                                                  |
|  GPU   GI   CI        PID   Type   Process name                  GPU Memory |
|        ID   ID                                                   Usage      |
|=============================================================================|
|    0   N/A  N/A     15060    C+G   C:\Windows\explorer.exe         N/A      |
+-----------------------------------------------------------------------------+
This can tell your high level nVidia details.
- Driver: v527.56
- CUDA: v12.0
- VRAM in Use: 759 MB / 24576 MB
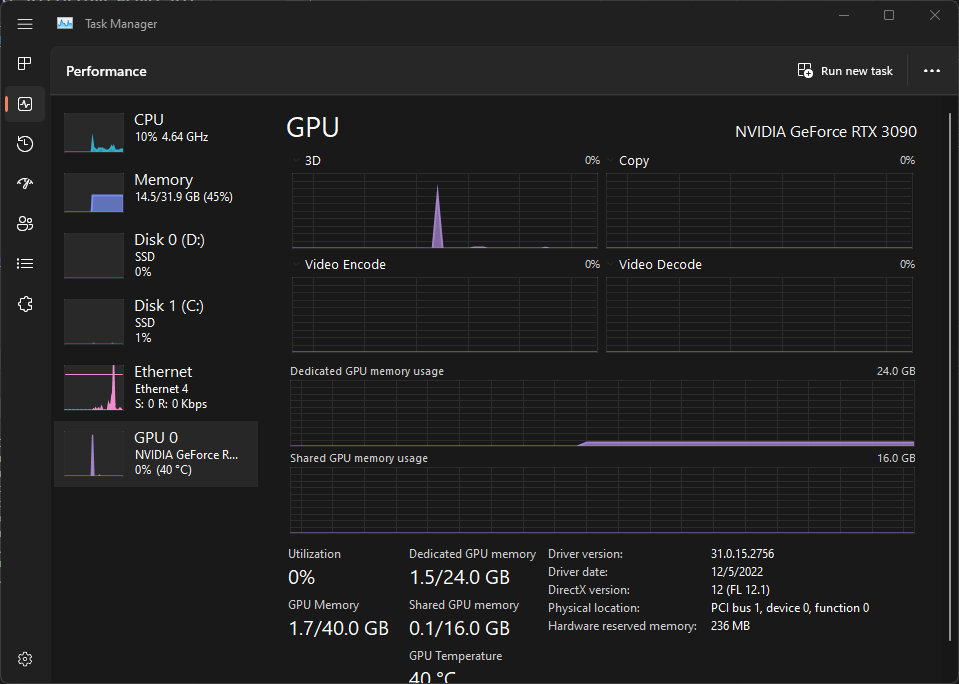
You can also monitor your GPU in Task Manager on Windows 10/11.
Steps For Windows (borrowed from the Repo)
- Install Python 3.10.6, checking "Add Python to PATH"
- Install git.
- Download the stable-diffusion-webui repository, for example by running
git clone https://github.com/AUTOMATIC1111/stable-diffusion-webui.git. - Place
model.ckptin themodelsdirectory (see dependencies for where to get it). - (Optional) Place
GFPGANv1.4.pthin the base directory, alongsidewebui.py(see dependencies for where to get it). - Run
webui-user.batfrom Windows Explorer as normal, non-administrator, user.
The Models
The model.ckpt file is not included in the repo but this is 100% needed for the magic to begin.
- You need a training checkpoint model.
- If you want to use the same checkpoint of StableDiffusion that I used in the guide, you can grab the
768from HuggingFace here. - That latest version of the checkpoint is v2.1.
- If you want to use the same checkpoint of StableDiffusion that I used in the guide, you can grab the
- You will need a v2 inference configuration.
- Stability AI's inference
config.yamlwill get you started and that is located here for v2.
- Stability AI's inference
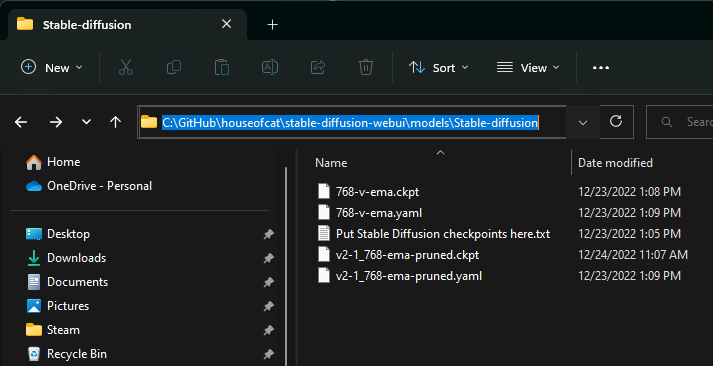
Once these are both downloaded, you will place the Checkpoint in the Stable-diffusion folder under models.
Also copy in the above config.yaml and rename it to match the checkpoint (but keep the .yaml file extension.)
Depending on where you cloned the stable-diffusion-webui repo, the path for checkpoint models/configs
should look something like this:
C:\GitHub\houseofcat\stable-diffusion-webui\models\Stable-diffusion
Pre-Run Tweaking
Assuming that you have the right Python version installed (listed above), GIT is installed, and your models are placed in the right folder, you should be able to get started. I do recommend one quick tip before you begin prompts. VRAM usage was a bit wonky for my first few tries.
I modified the webui-user.bat to add PYTORCH configuration change:
set PYTORCH_CUDA_ALLOC_CONF=garbage_collection_threshold:0.6,max_split_size_mb:64
@echo off

set PYTHON=
...

set PYTORCH_CUDA_ALLOC_CONF=garbage_collection_threshold:0.6,max_split_size_mb:64

...

call webui.bat
This will aid in keeping the VRAM usage lower and have a bit of a smaller overall footprint due to
garbage collection cleanup. There are thousands of other tweaks, but I was honestly getting
OutOfMemory exceptions while requesting 4GB but having 13 GB indicated free on the GPU.
This seemed to reduce the frequency of that.
I recommend upgrading PIP as well.
python -m pip install --upgrade pip
First UI Run
Navigate to your stable-diffusion-webui folder, copy the path, and open up a Terminal/CMD/PowerShell as Admin.
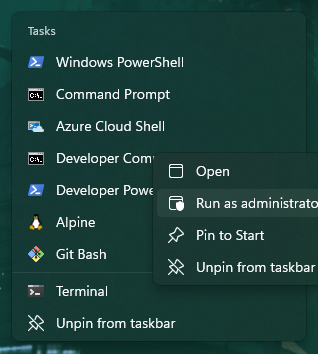
Windows PowerShell
Copyright (C) Microsoft Corporation. All rights reserved.

PS C:\Users\cat> cd C:\GitHub\houseofcat\stable-diffusion-webui
Then execute webui-user.bat.
Windows PowerShell
Copyright (C) Microsoft Corporation. All rights reserved.

PS C:\Users\cat> cd C:\GitHub\houseofcat\stable-diffusion-webui
PS C:\GitHub\houseofcat\stable-diffusion-webui> .\webui-user.bat
venv "C:\GitHub\houseofcat\stable-diffusion-webui\venv\Scripts\Python.exe"
Python 3.10.6 (tags/v3.10.6:9c7b4bd, Aug  1 2022, 21:53:49) [MSC v.1932 64 bit (AMD64)]
Commit hash: 685f9631b56ff8bd43bce24ff5ce0f9a0e9af490
Installing requirements for Web UI
Launching Web UI with arguments:
No module 'xformers'. Proceeding without it.
Loading config from: C:\GitHub\houseofcat\stable-diffusion-webui\models\Stable-diffusion\768-v-ema.yaml
LatentDiffusion: Running in v-prediction mode
DiffusionWrapper has 865.91 M params.
Loading weights [2c02b20a] from C:\GitHub\houseofcat\stable-diffusion-webui\models\Stable-diffusion\768-v-ema.ckpt
Applying cross attention optimization (Doggettx).
Model loaded.
Loaded a total of 0 textual inversion embeddings.
Embeddings:
Running on local URL:  http://127.0.0.1:7860

To create a public link, set `share=True` in `launch()`.
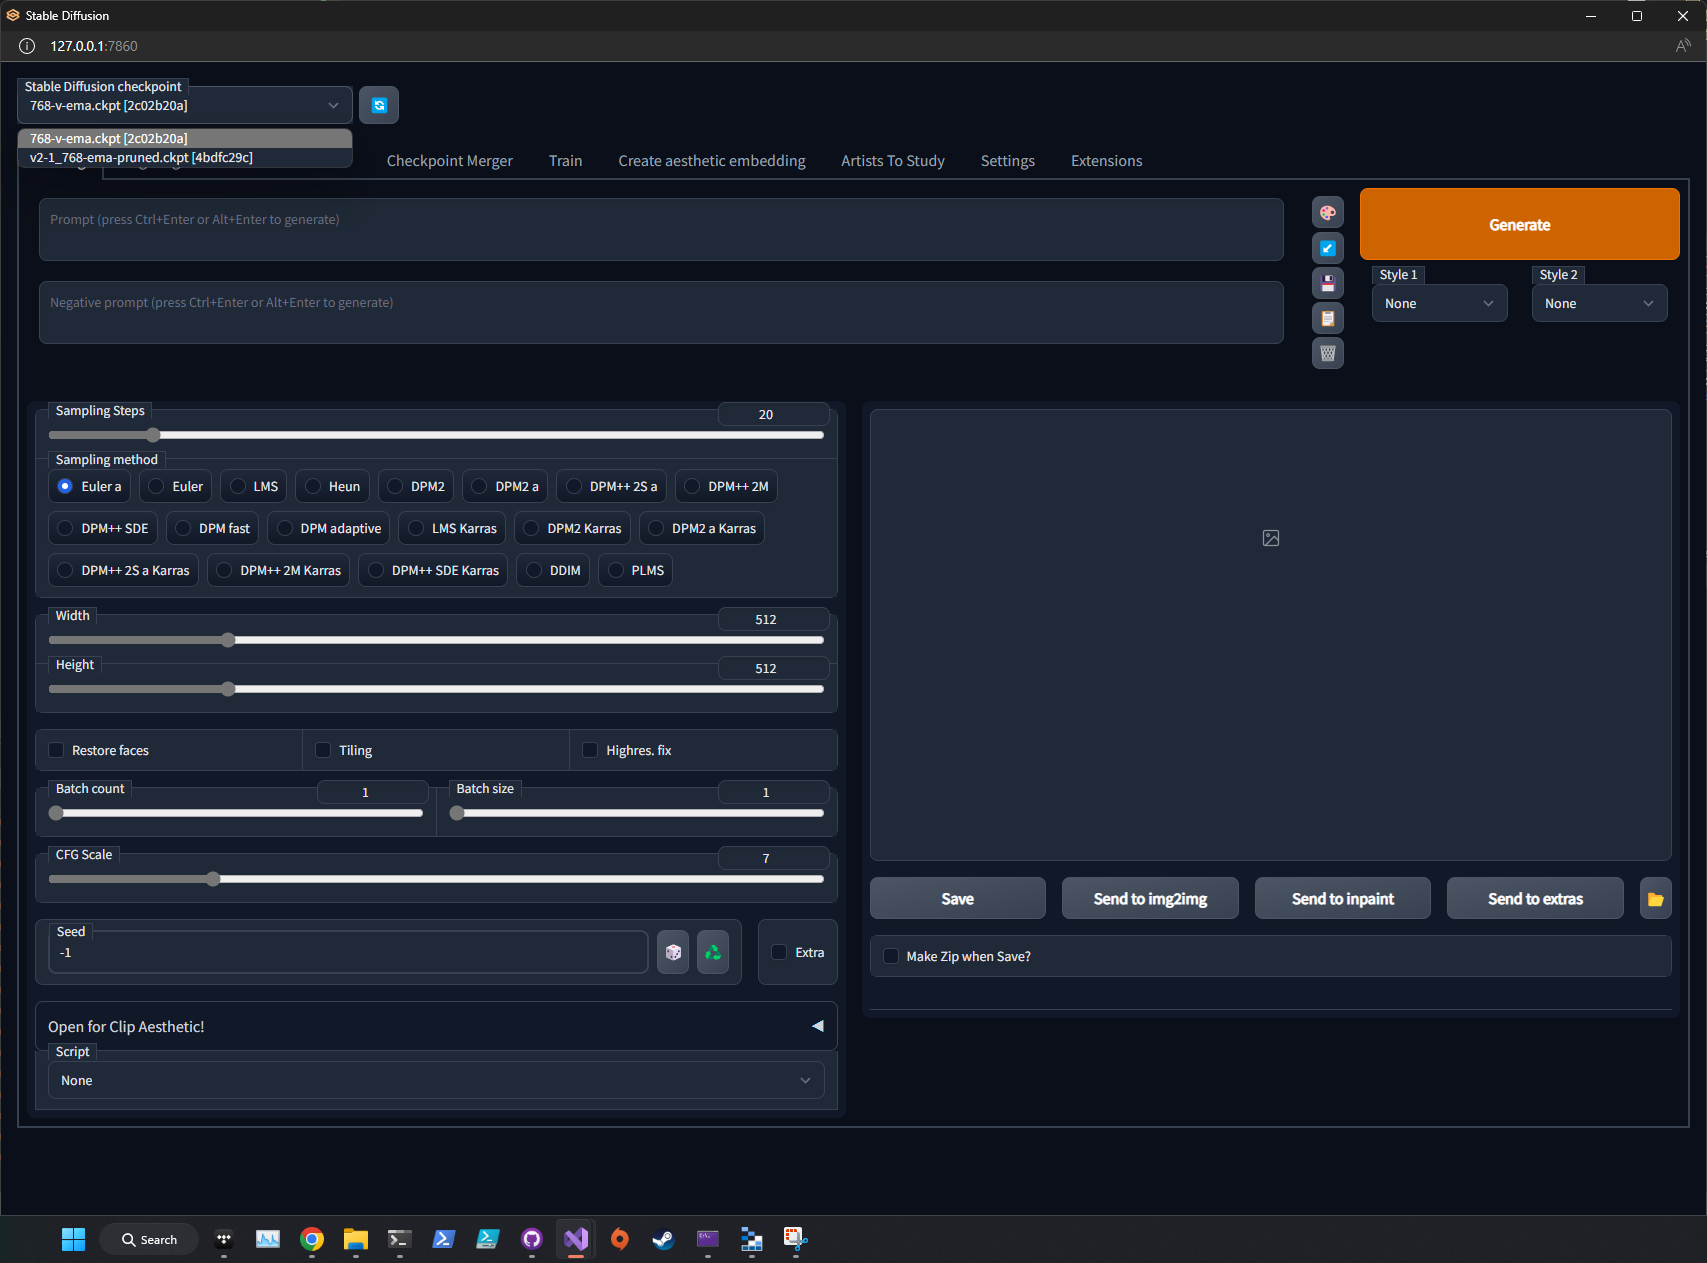
As you can see it says
Running on local URL: http://127.0.0.1:7860
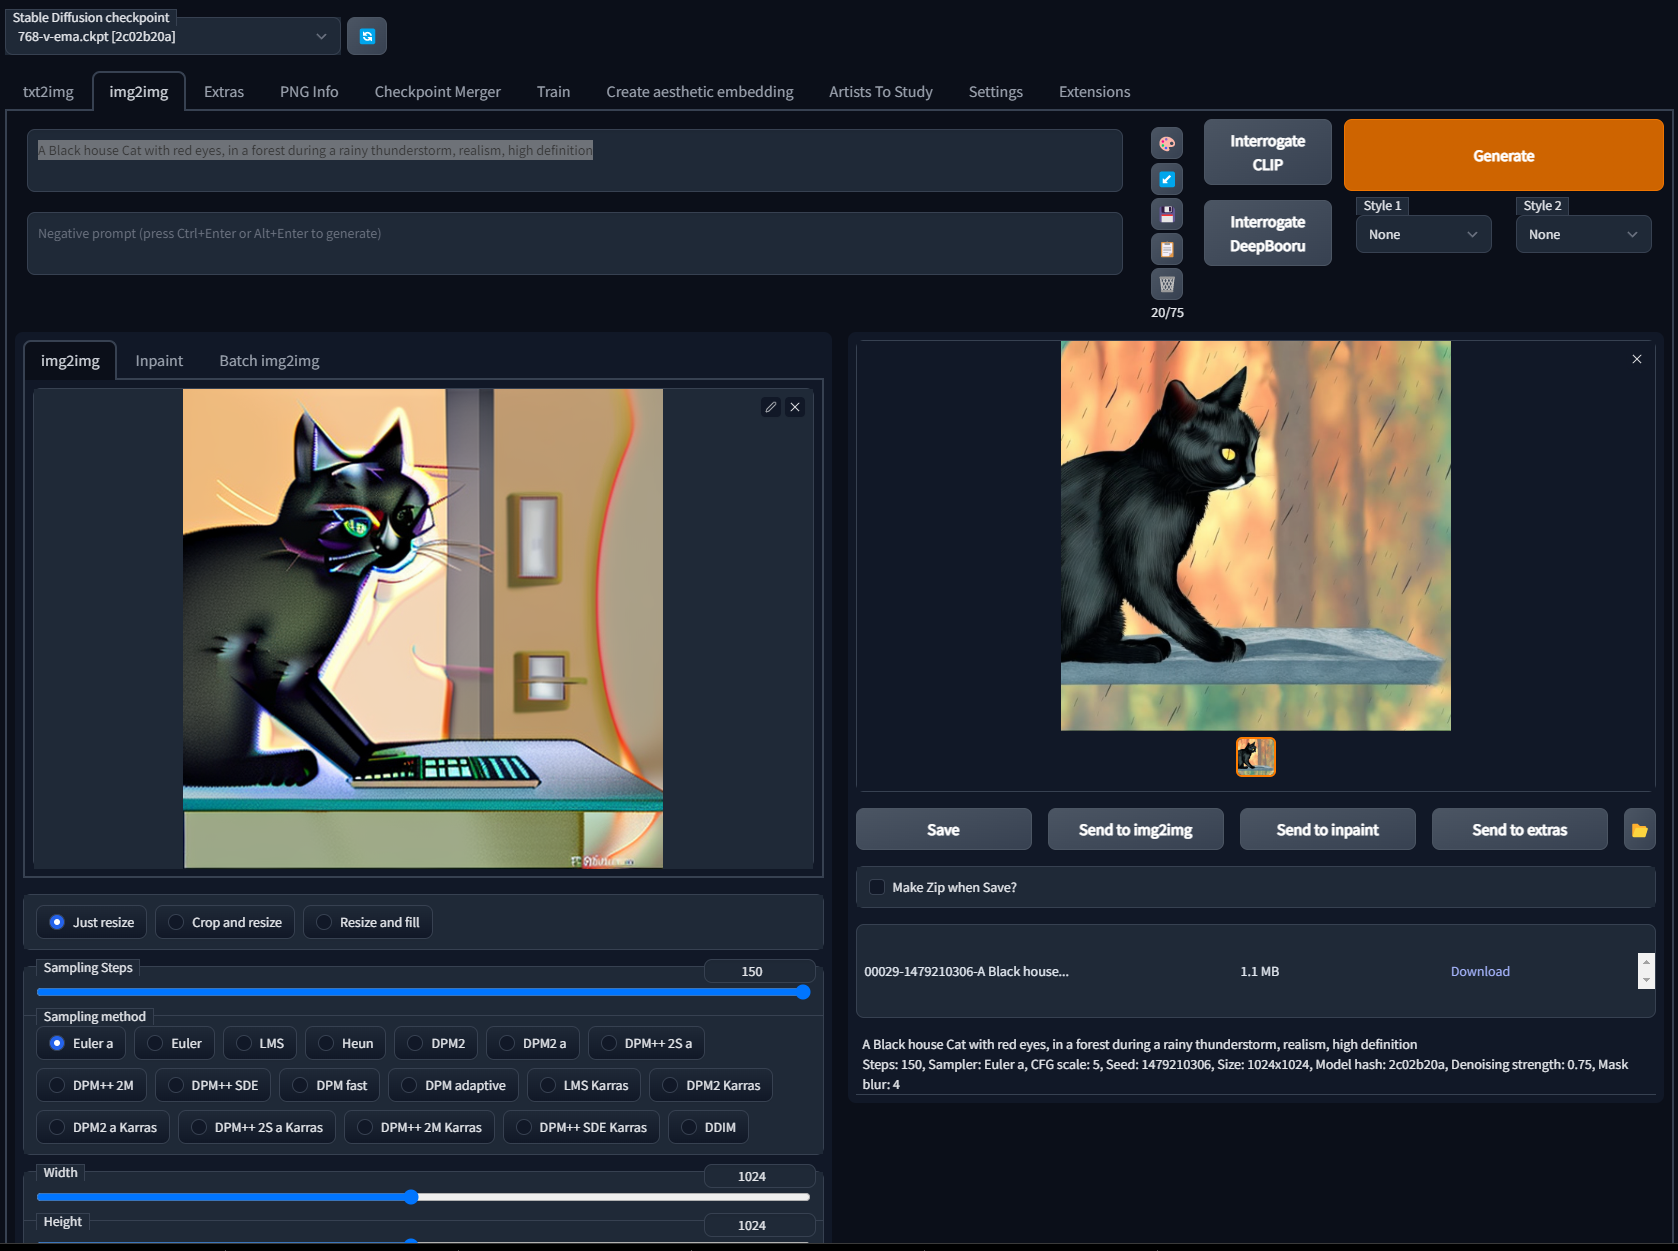
This means you can now navigate to http://127.0.0.1:7860 in your browser. Here's what it should look like. Notice the Stable Diffusion Checkpoint drop down in the top left corner. These items should match the ones you placed in the folder.
You may get errors in your first run of the WEBUI. Python is really good at suggesting commands
to try an update or install what is missing. Try and run any commands it suggests on error.
Do note though, Python always creates a virtual Python environment folder local (VENV).
You will always want to delete the VENV folder when trying large scale Python changes
(installs/reinstalls etc.) so you can give it a fresh slate and make sure nothing
is cached from the previous setup attempt.
If you don't see anything in the Checkpoint drop down, review the Models step.
First Image Prompt
Let's fire it up!
First Run (Text Prompt)
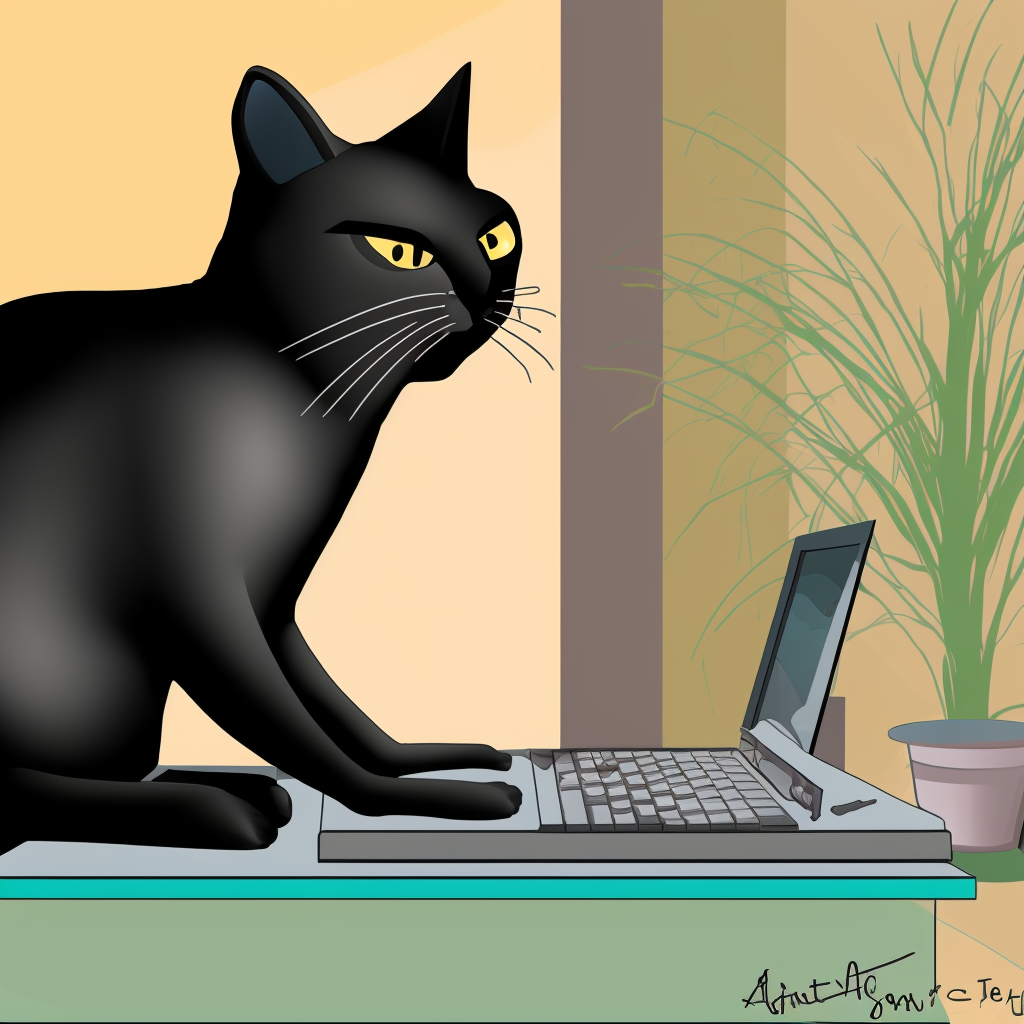
A black house cat typing on a computer, artstation, high defintion
Settings
Model: 2c02b20a (v2 768)
Batch Count: 1
Batch Size: 6
Steps: 30
Resolution: 512x512
CFG: 7
Output Grid
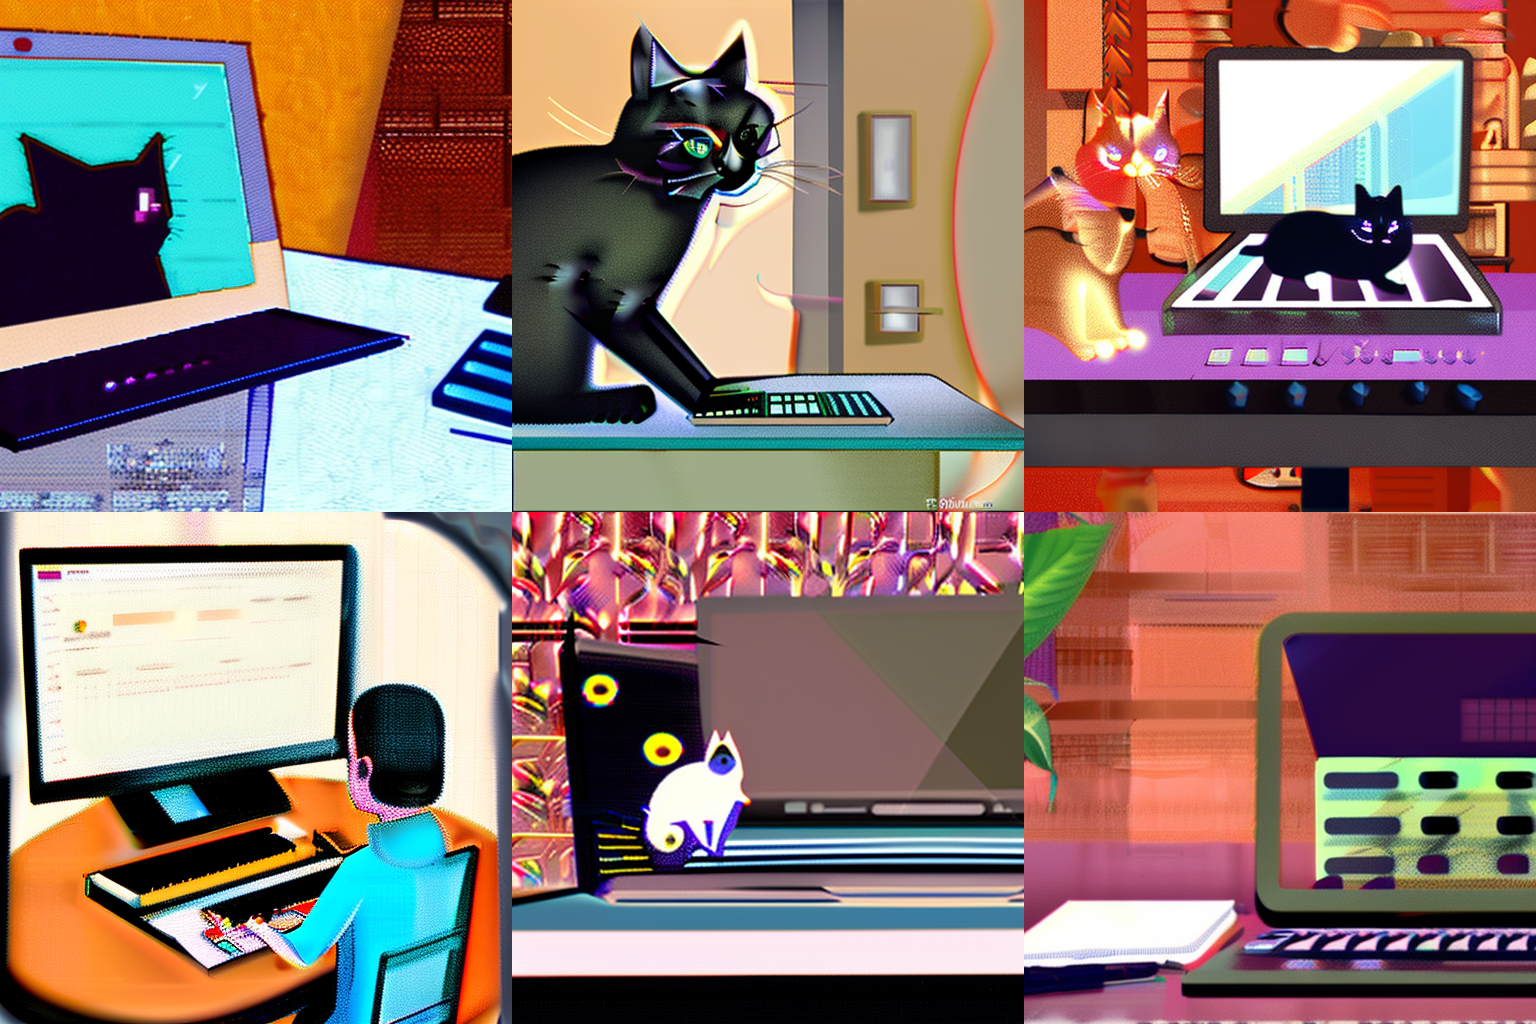
Well these all look kind of rough. When generating batches though you can't always expect diamonds... That top middle one is really catching my eye... I bet it has potential! Before I disregard this group and start generating a new set, let's select one and see if we can enhance it further.

First Enhancement Run (Image Prompt)
Let's select the image we liked from the output grid.
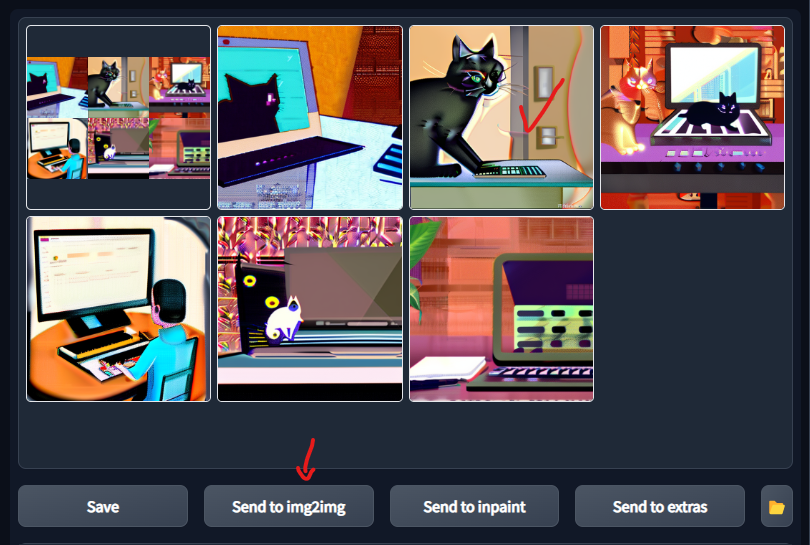
Output Image 1
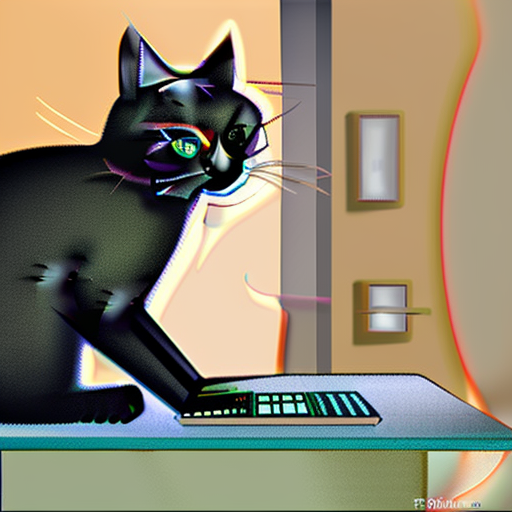
A black house cat typing on a computer, artstation, high defintion
Steps: 30, Sampler: Euler a, CFG scale: 7, Seed: 2089545485, Size: 512x512, Model hash: 2c02b20a, Batch size: 6, Batch pos: 1
We are going to switch to img2img (Image as a prompt) so we can build a new image with this
as a preliminary noise base image. We increase the inference steps to 150 (the maximum) to
really enhance the quality/details. This should flesh out the details. I also increase the
resolution to double while we are at and view the output. We will keep the same Txt Prompt:
A black house cat typing on a computer, artstation, high defintion
Output Image 2
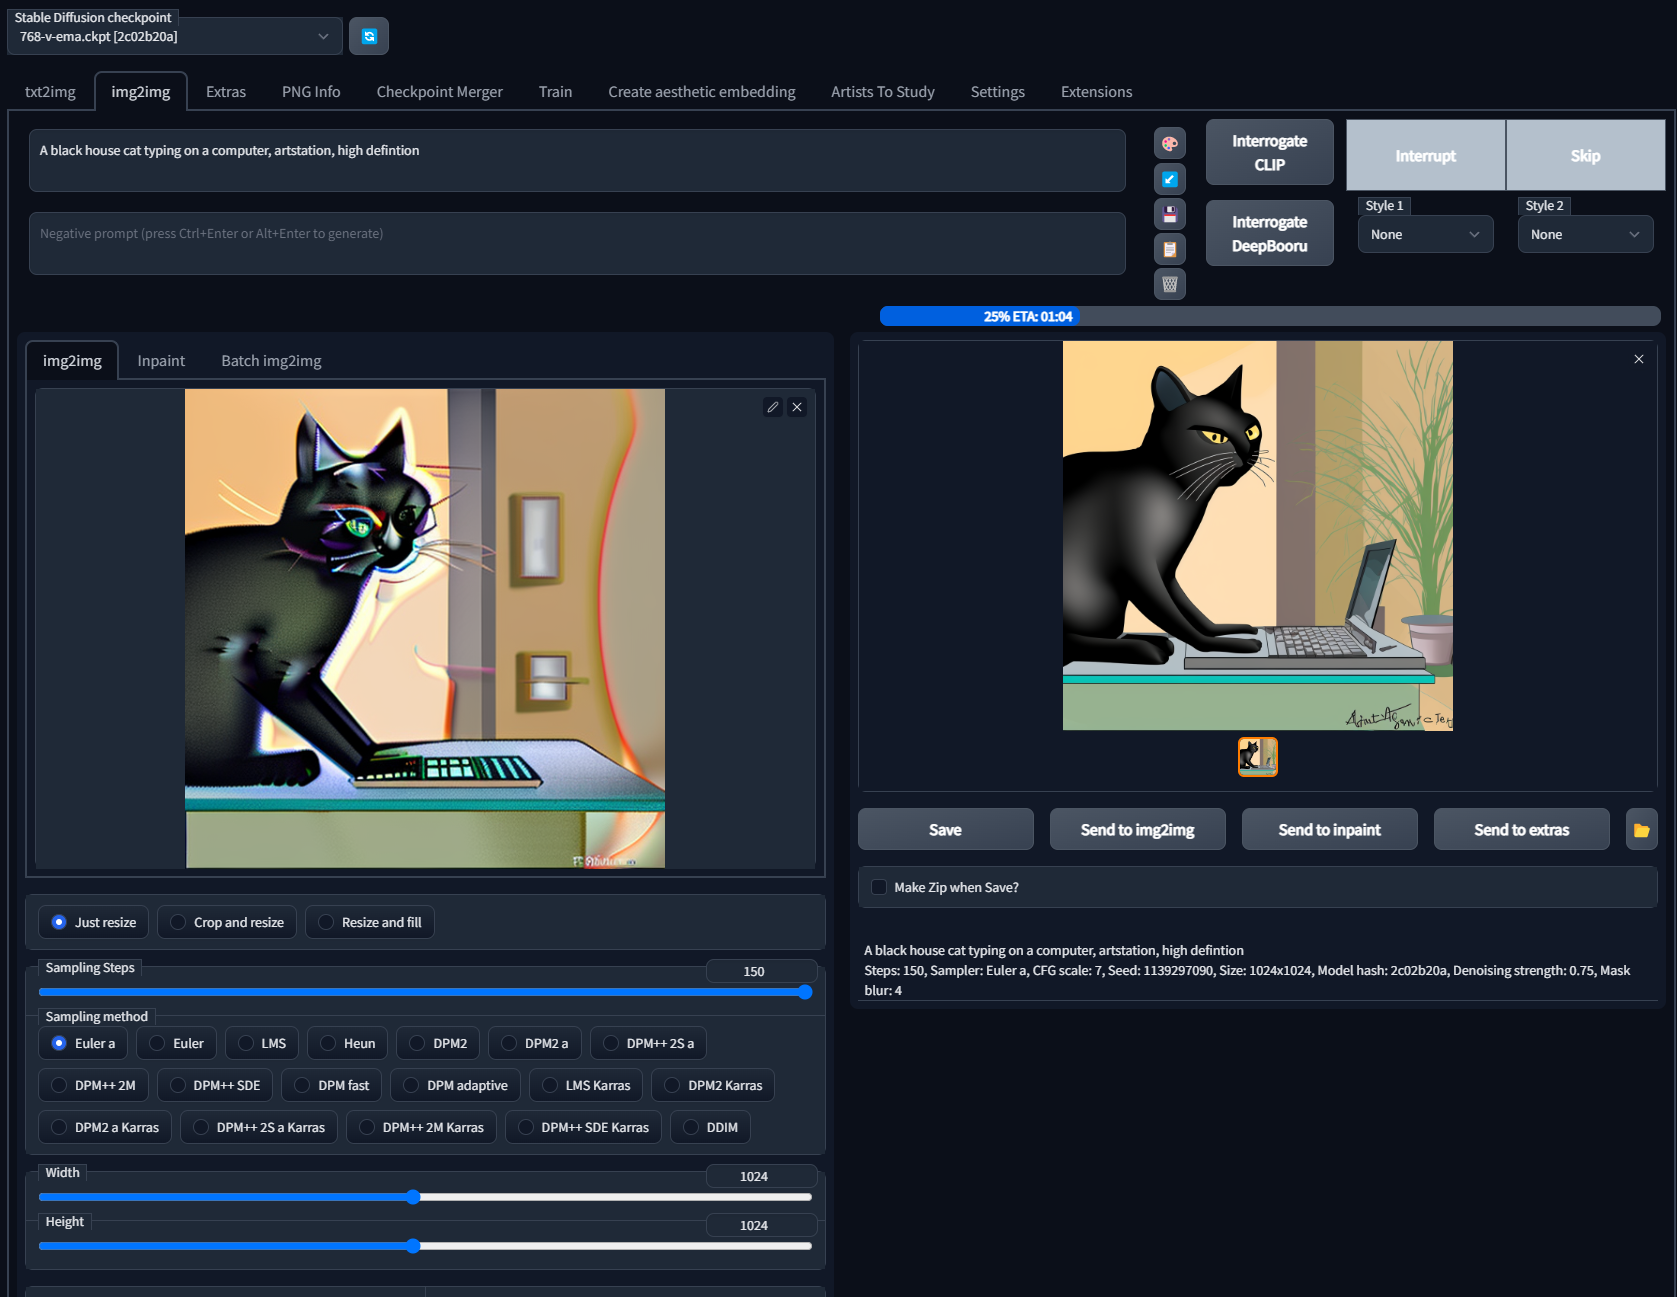
There we go, we have something much closer to a typical house cat and not a Picaso's cat.
Settings
- Model: 2c02b20a (v2 768)
- Batch Count: 1
- Batch Size: 1
- Steps: 150
- Resolution: 1024x1024
- CFG: 7
Steps: 150, Sampler: Euler a, CFG scale: 7, Seed: 1139297090, Size: 1024x1024, Model hash: 2c02b20a, Denoising strength: 0.75, Mask blur: 4
Second Enhancement Run (Image Prompt)
I like the progress we have made. I also have finally noticed a typo in the text prompt. Let's
alter the text prompt to correct the word definition, make some other text prompt changes,
and decrease the CFG to 5 to let it get a more liberal image generation.
Text Prompt
A Black house Cat with red eyes, in a forest during a rainy thunderstorm, realism, high definition
Settings
- Model: 2c02b20a (v2 768)
- Batch Count: 1
- Batch Size: 1
- Steps: 150
- Resolution: 1024x1024
- CFG: 5
GPU Monitoring
Looking at our GPU while running through GPU-z
Example UI
Output Image 3
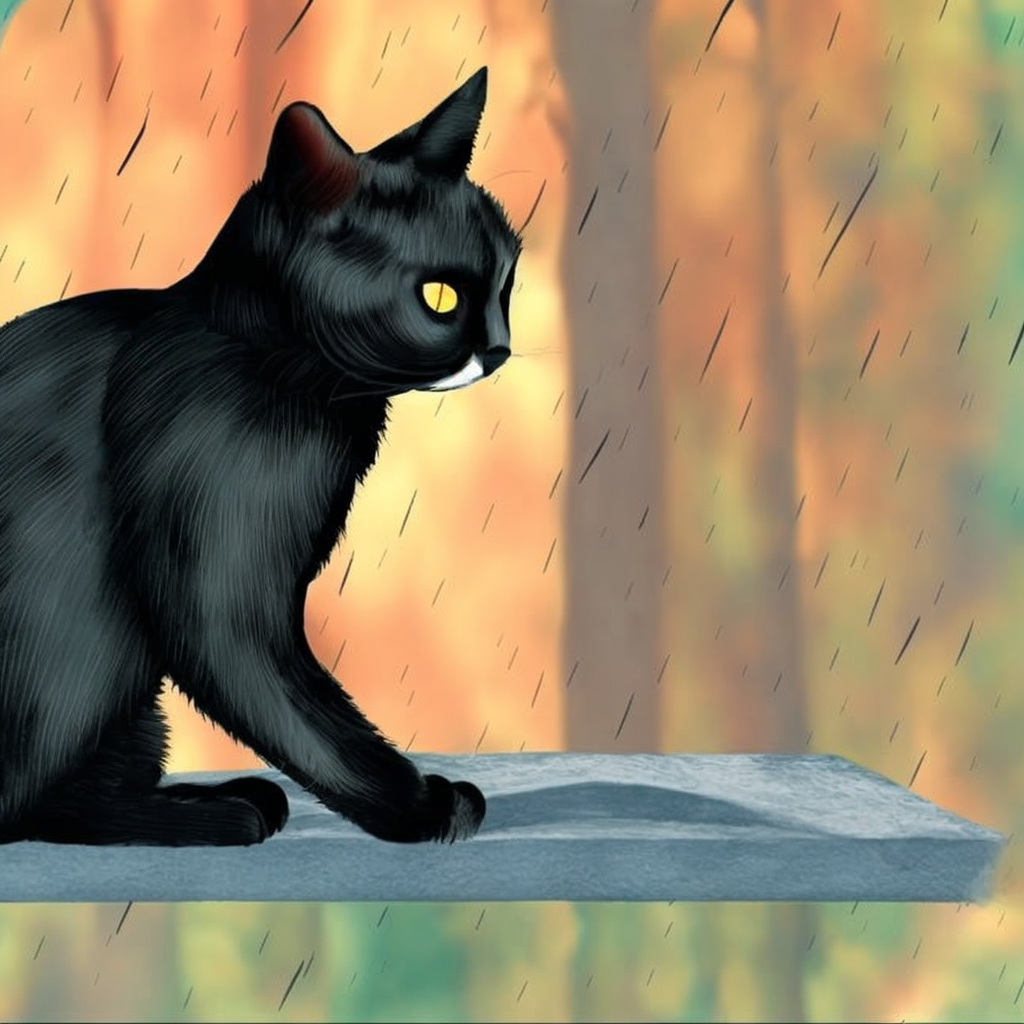
A Black house Cat with red eyes, in a forest during a rainy thunderstorm, realism, high definition
Steps: 150, Sampler: Euler a, CFG scale: 5, Seed: 1479210306, Size: 1024x1024, Model hash: 2c02b20a, Denoising strength: 0.75, Mask blur: 4
Third Enhancement Run (Image Prompt)
I love the new image, but I feel we can do better. I am going to send it to image prompt and try again, only this time with an even lower CFG and lower the denoising strength.
Text Prompt
A Black house Cat with red eyes, in a forest during a rainy thunderstorm, realism, high definition
Settings
- Model: 2c02b20a (v2 768)
- Batch Count: 1
- Batch Size: 1
- Steps: 150
- Resolution: 1024x1024
- CFG: 1
- Denoise Strength: 0.5
Output Image 4
Here we go, we have a solid rendering of a black cat surveying his forest.
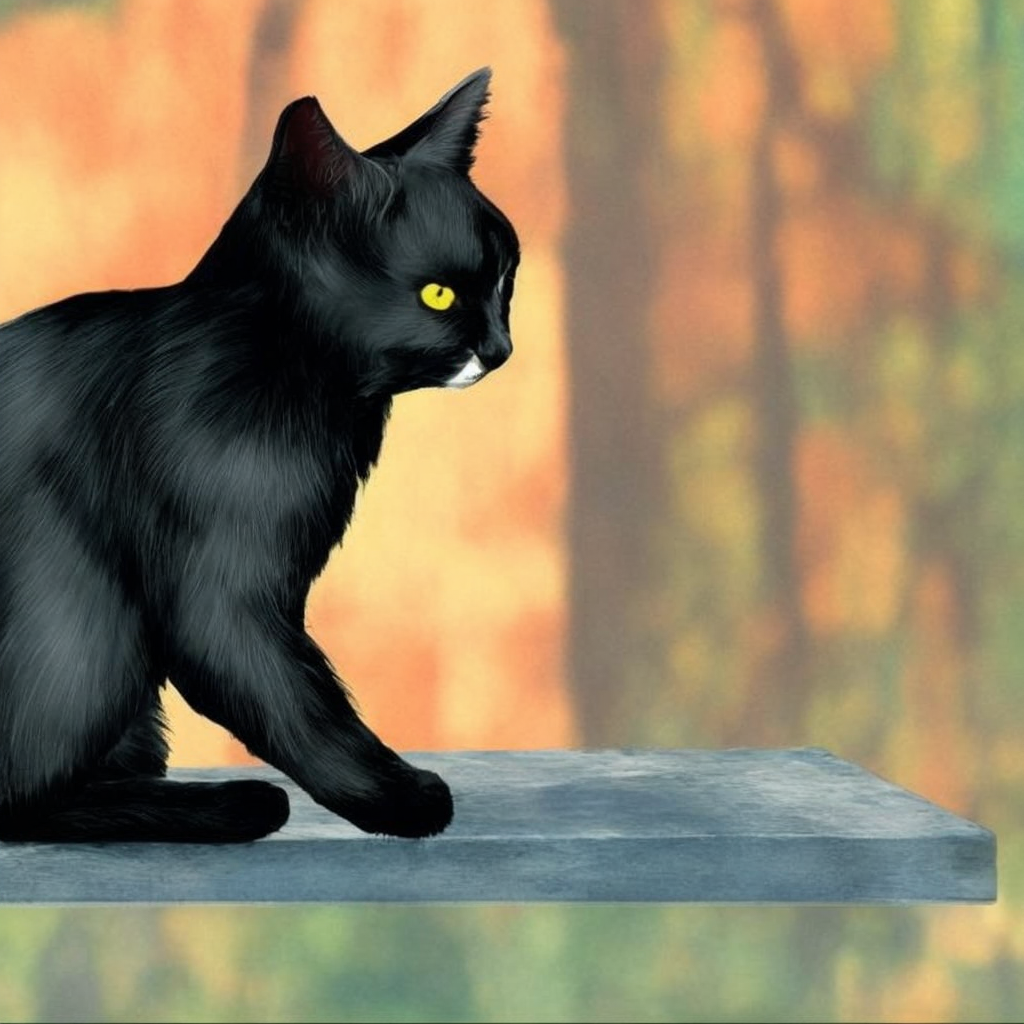
A Black house Cat with red eyes, in a forest during a rainy thunderstorm, realism, high definition
Steps: 150, Sampler: Euler a, CFG scale: 1, Seed: 615367035, Size: 1024x1024, Model hash: 2c02b20a, Denoising strength: 0.5, Mask blur: 4
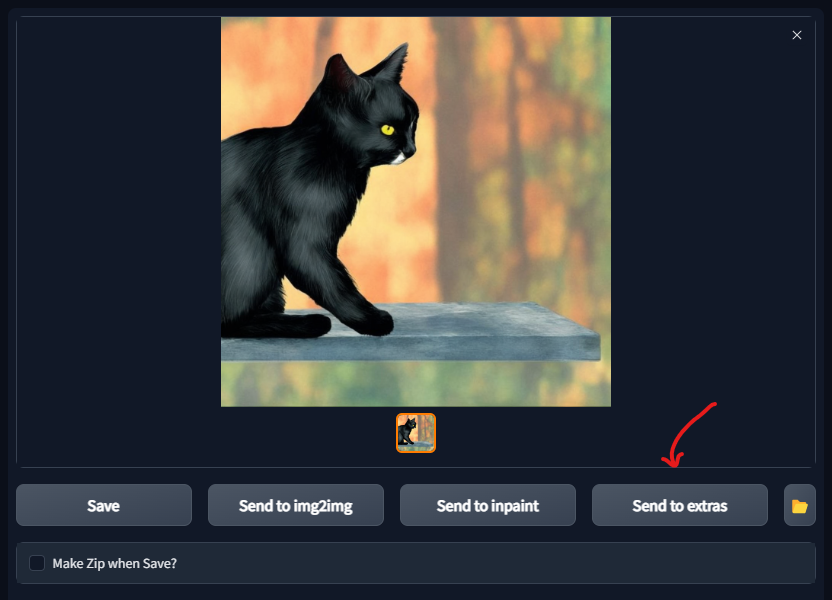
Fourth Run: Enhance! (Extras)
Now while the render doesn't match my prompt, I feel it is a good picture and I am going to rescale it!
Currently, it's only 1024x1024, so I am going to rescale it on the Extras tab.
Let's set the rescale target to 4x and use the R-ESGRAN Anime4x+ to upscale it.
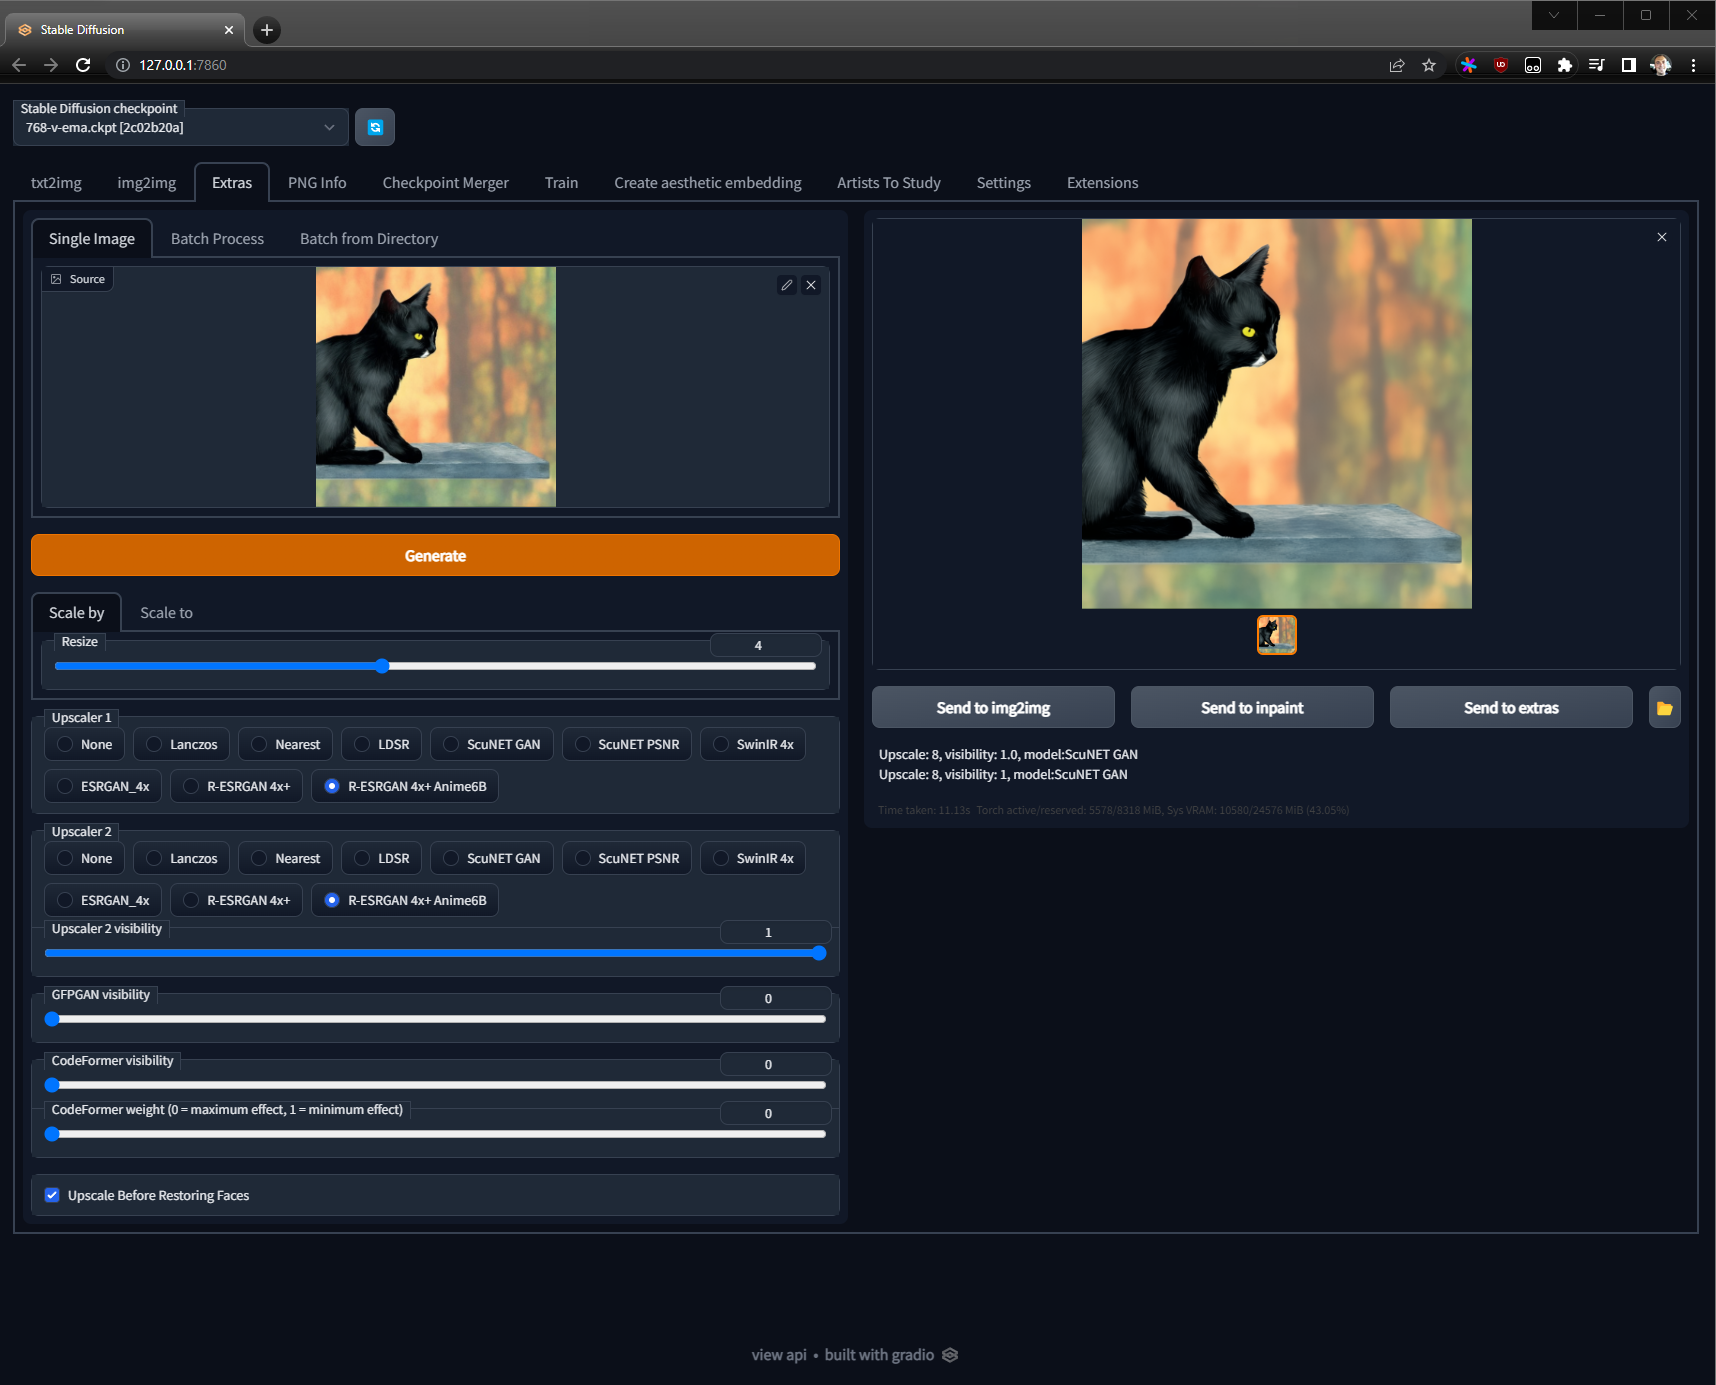
Settings
- Resize: 4x
- Upscaler1: R-ESRGAN 4x+ Anime6B
- Upscaler2: R-ESRGAN 4x+ Anime6B
- Upscale Before Restoring Faces checked
Output Image 5
Now this, is perfect to me.
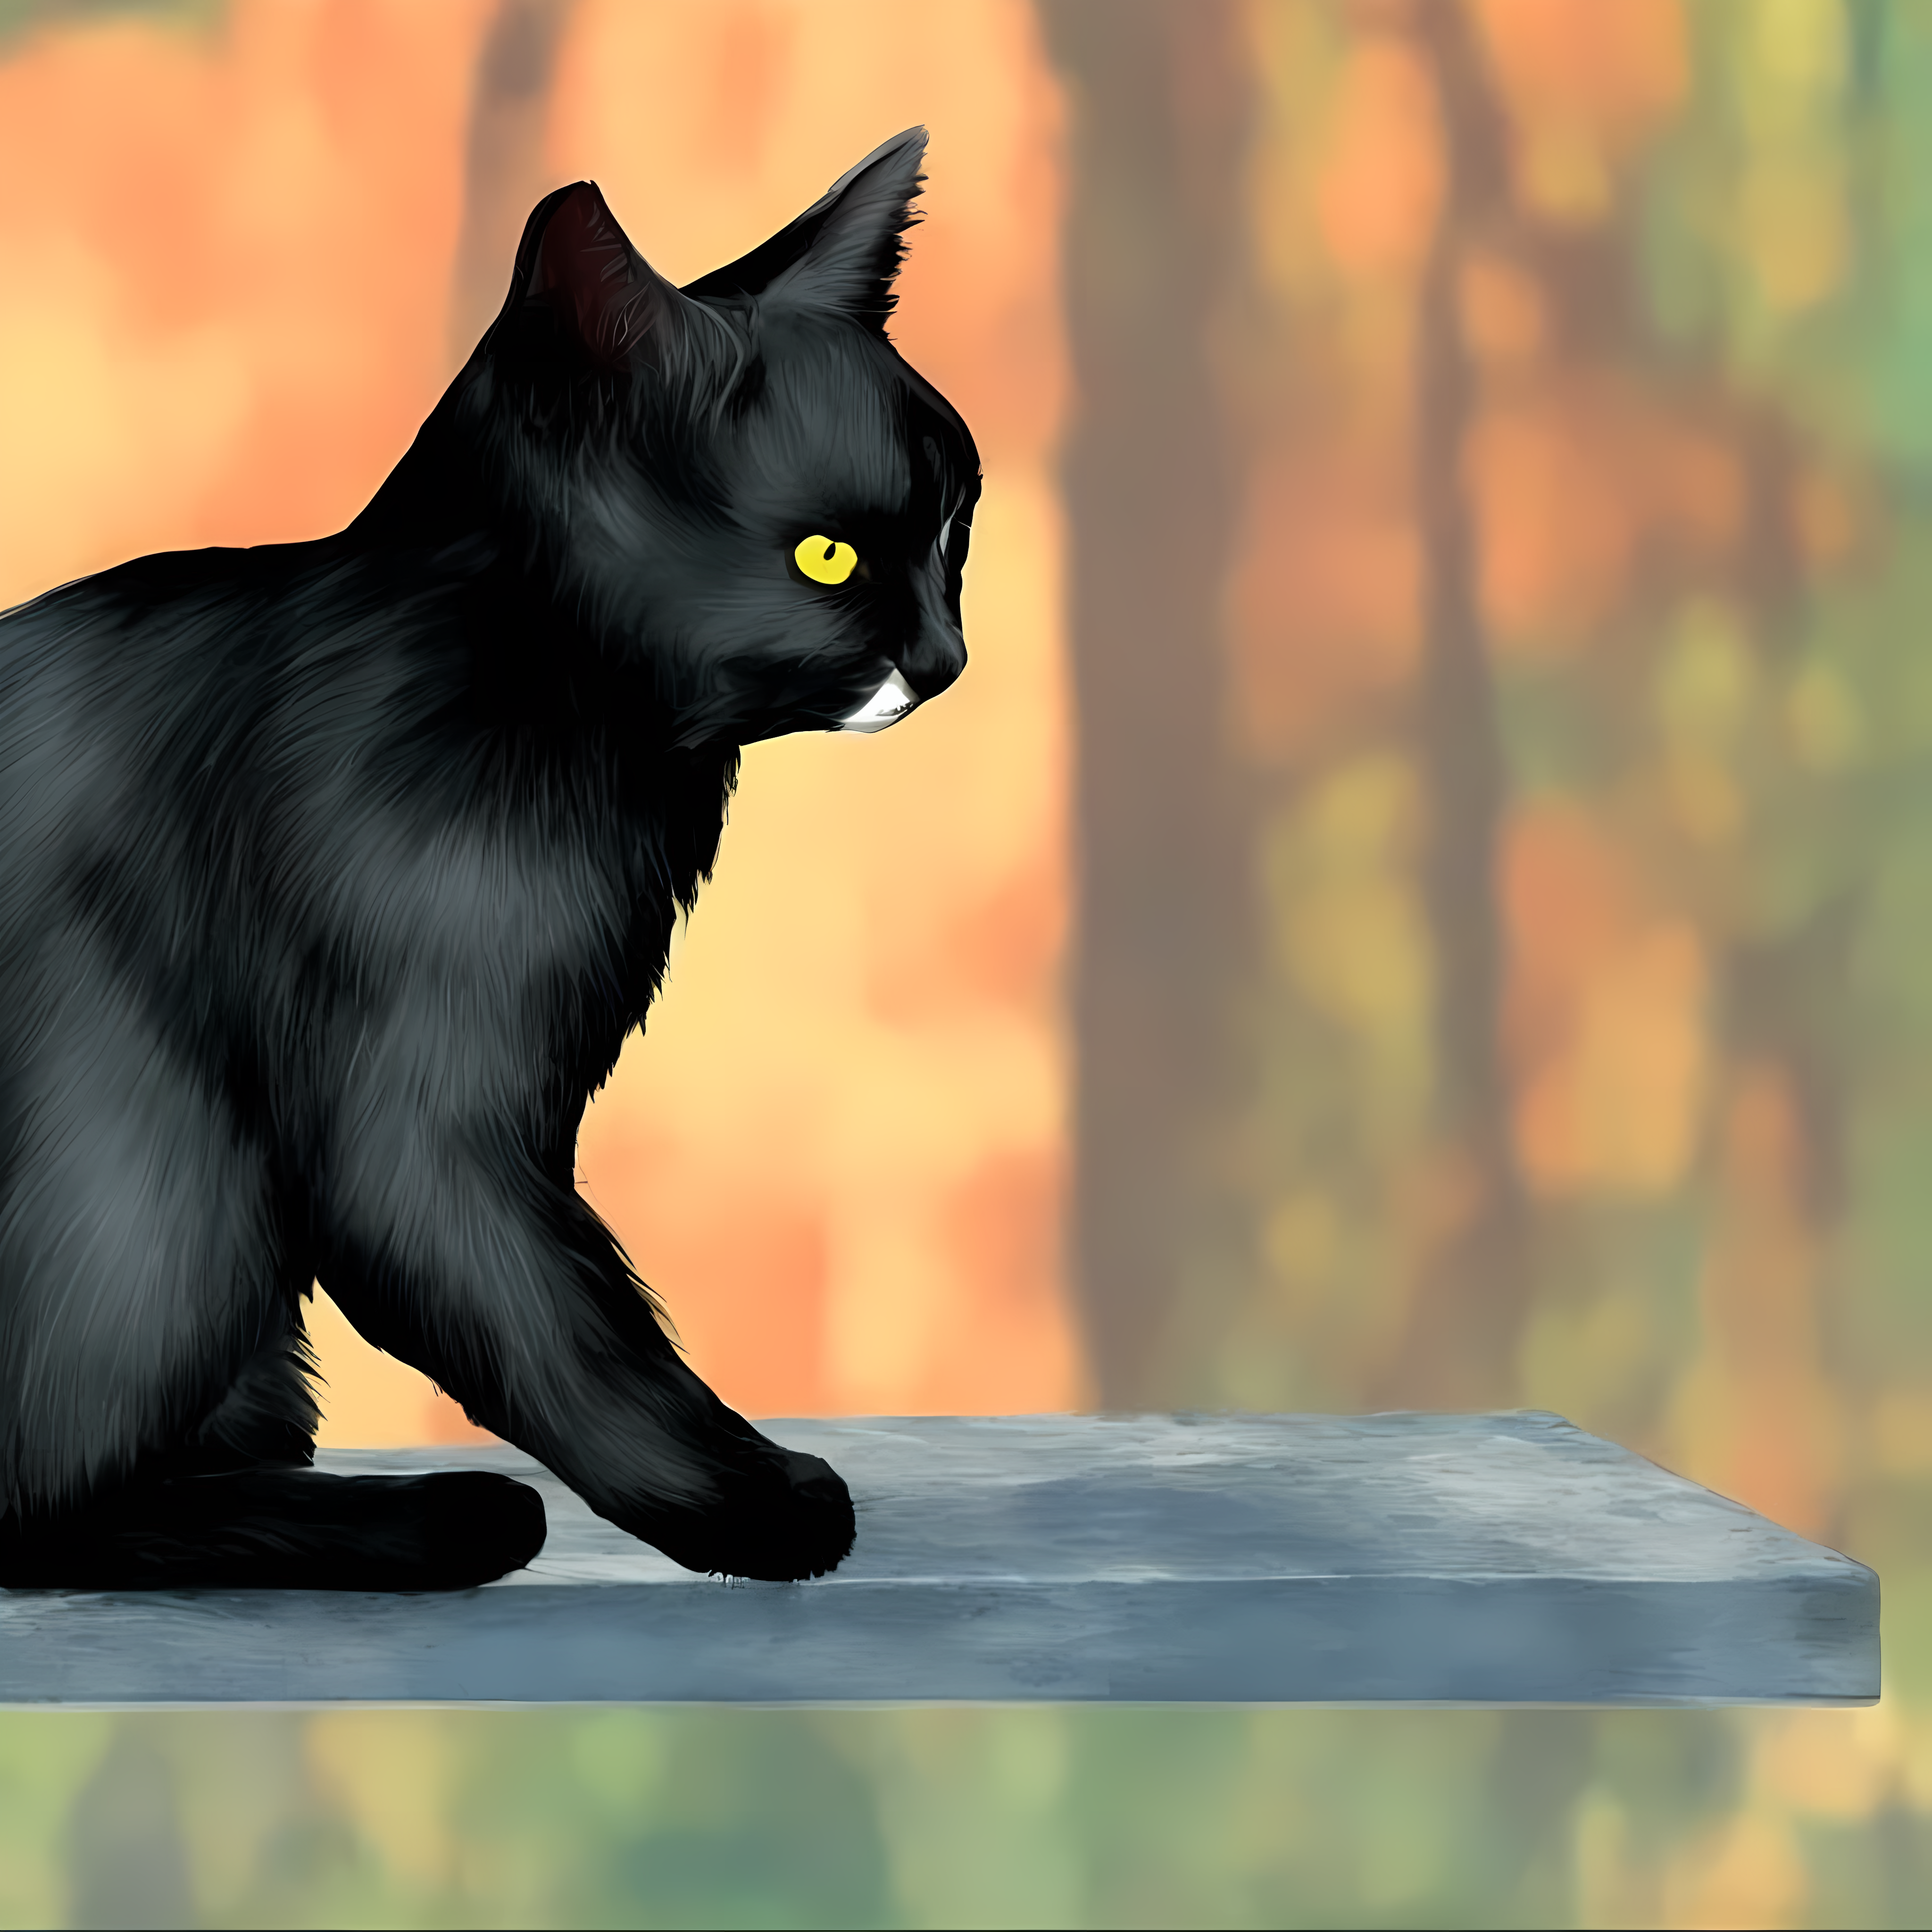
Note: Be sure to download the full 8 MB size image to zoom in on.
OutOfMemory Exceptions/Gotcha
If you do start getting OUTOFMEMORY type of exceptions but they don't seem normal, restart your system.
Let me give you an example.
Let's say you were doing a Batch Size of 6, 512x512 images, at 30 steps. Everything was working fine and only using 13 GB of VRAM. You have 24 GB of VRAM and you decide to try for 7 and boom! CRASH. So naturally you think, I'll just go back to 6... So you try 6 again and then boom! CRASH?! This was previously working?!
DON'T WASTE TOO MUCH TIME TROUBLESHOOTING
Just close everything, turning it off and on again. You may even need to do a total restart.
Note: If you undo your settings change (i.e. go back to batch size of 6 from 7) and it is working again, then the batch size of 7 was just the limit of your system. It hit its head on the ceiling during processing and it can spike so briefly that you can't quite view it on any instrumentation. Hopefully you are monitoring your GPU to get familiar with how high you can adjust certain values and become familiar with how much a value impacts your GPU.
Example Error Message
Error completing request
...

RuntimeError: CUDA out of memory. Tried to allocate 11.32 GiB
(GPU 0; 24.00 GiB total capacity; 14.03 GiB already allocated; 7.31 GiB free; 14.22 GiB reserved in total by PyTorch)
If reserved memory is >> allocated memory try setting max_split_size_mb to avoid fragmentation.
See documentation for Memory Management and PYTORCH_CUDA_ALLOC_CONF
Final Thoughts
There you have it! Once the rescaled image above is done rendering in your browser, open it up in a new tab so you can really zoom in it. There you will be able to fully appreciate the quality of what was made by the model!
TL;DR - Quick Recap
- Setup Python and GIT for Windows.
- Cloned Automatic1111 Stable Diffusion Web UI repo from GitHub.
- Downloaded StableDiffusion Model v2.
- Downloaded the Config for Inference for v2.
- Placed both of these items together (after renaming the config) in the correct directory.
- Tweaked the WEBUI-User.bat to adjust GC threshold and memory fragmentation limit sizes.
- Run the webui-user.bat from a terminal (as Admin) which starts the UI server.
- Navigate to http://127.0.0.1:7860/ in our browser.
- Choose our Stable Diffusion Checkpoint from the drop down.
- Render our first Text Prompt.
- Enhanced the image as an Image Prompt.
- Reenhanced the image by using the previous image as a new Image Prompt and modifying the Text Prompt.
- Then 4x scaled the image with a GAN in an anime style!
That's a pretty basic setup and introduction user guide for Stable Diffusion using AUTOMATIC1111's super awesome repo. I hope you enjoyed it and learned something new.
Links
- Medium Article - A Simple Way To Run Stable Diffusion 2.0 Locally On Your PC — No Code Guide
- Stable Diffusion Model - v2.0 768 Checkpoint
- Stable Diffusion Model - v2.1 768 Checkpoint